Monday, November 9, 2015

Crock Pot Rice Pudding


Crock Pot Rice Pudding


Ingredients:
3 tbsp. butter
6 cups whole or 2% milk (no skim milk - it's too watery)
2 cups Minute® White Rice (uncooked)
3/4 cup sugar
1/4 tsp. salt
1/2 tsp. cinnamon
1/3 tsp. vanilla extract
2 tbsp. brown sugar

Directions:
Grease the inside of a 4-quart slow cooker with butter. Be sure to get the sides too. Set aside the butter for use again in just a minute. Note: You can use a round, oval or casserole-shaped slow cooker. Cooking times may vary slightly when using different shaped slow cookers.

Add the milk, Minute Rice, sugar, salt, cinnamon, vanilla extract and brown sugar into the crock pot.
Give it a gentle stir. Then dot the top with the remaining butter.

Cover and cook on low for about 3-4 hours (stirring occasionally while cooking.)

When the rice is tender, it is ready. Stir well, then top with a sprinkling of cinnamon. This dish will thicken as it cools. If it isn't thick enough for your tastes, just let it hang out for about 30 minutes and it will get thicker. Alternatively, if you want to thicken it, just add a bit of milk until you reach the desired consistency.

Cook's Notes: This dish is traditionally made with raisins added. If you want to add them, stir about a cup of raisins in during the last hour of cooking. Also, to change it up a bit, you could used dried cranberries as well.


Crock Pot Rice Pudding

Let me start by saying that this ain't your Grandma's rice pudding. I feel rice pudding gets a bad rap. It's kinda like fruit cake. Some folks associate these foods with a different generation and not for our 'foodie' generation. They might feel it's too old school or is more for a retirement home than in the hipster homes of today. Well, ya know what? We're bringing rice pudding back. We are taking it back from the dusty old recipe card that sits underneath a stack of highly photogenic food-craft cookbooks. This stuff is good and it's good for any generation. Let me highlight a few of its qualities, shall I?


(B.) It has a 5 minute prep time and takes up no oven space. This is a big deal for holiday meals when oven space is at a premium. I made this recipe specifically for the crock pot. I'm using Minute® Rice (makes prep time way faster!) You don't even need a bowl to mix it up. You throw in all the ingredients - BOOM! You got dessert started. And that is my big tip for the holidays right there. Keep the Minute® Rice in your pantry! You can make so much with it and there is minimal prep time (but it still tastes awesome sauce.) And I might add, the Minute® Rice Whole Grain Brown Rice is on point! 


Ingredients:
3 tbsp. butter
6 cups whole or 2% milk (no skim milk - it's too watery)
2 cups Minute® White Rice (uncooked)
3/4 cup sugar
1/4 tsp. salt
1/2 tsp. cinnamon
1/3 tsp. vanilla extract
2 tbsp. brown sugar


Directions:
Grease the inside of a 4 quart slow cooker with butter. Be sure to get the sides too. Set aside the butter for use again in just a minute. Note: You can use a round, oval or casserole-shaped slow cooker. Cooking times may vary slightly when using different shaped slow cookers. 


Add the milk, Minute Rice, sugar, salt, cinnamon, vanilla extract and brown sugar into the crock pot.


 Give it all a gentle stir. Then dot the top with the remaining butter.
 
 
Cover and cook on low for about 3-4 hours. 
 
 
When the rice is tender, it is ready. Stir well, then top with a sprinkling of cinnamon.This dish will thicken as it cools. If it isn't thick enough for your tastes, just let it hang out for about 30 minutes and it will get thicker. Alternatively, if you want to thicken it, just add a bit of milk until you reach the desired consistency. 
 
 
Cook's Notes: This dish is traditionally made with raisins added. My family just doesn't care for raisins in this. But if you want to add them, stir about a cup of raisins in during the last hour of cooking. Also, to change it up a bit, you could used dried cranberries as well. 


Sunday, November 8, 2015

Tropical Dump Cake


.
1 20 ounce can cubed or crushed pineapple
1 15 ounce can tropical fruit
1 package of orange cake mix
1 1/2 sticks of butter
1/2 cup instant oatmeal
1 cup coconut flakes
.
Preheat oven to 350 degrees. Dump both of the fruits & their juices into a 9 x 12 Pyrex baking dish. Pour the dry cake mix on top of the fruit & spread out evenly. Mix oatmeal & coconut & sprinkle over cake mixture with fingers. Melt butter & pour on top evenly. It should cover the entire cake mix. Bake for one hour & serve with ice cream.


Blackberry Dumplings


Blackberry Dumplings

1 qt Fresh or frozen (loose-pack) blackberries
1 c Plus 1 tablespoon sugar, divided
3/4 teaspoon salt, divided
1/2 ts Lemon extract
1 1/2 c All-purpose flour
2 ts Baking powder
1/4 ts Ground nutmeg
2/3 c Milk Cream or whipped cream, optional


In a Dutch oven, combine the blackberries, 1 cup sugar, 1/4 teaspoon salt and lemon
extract. Bring to a boil; reduce heat and simmer for 5 minutes. 

Meanwhile, in a mixing bowl, combine flour, baking powder, nutmeg and remaining sugar and salt.
Add milk; stir just until mixed. (Dough will be very thick.) 

Drop by tablespoonfuls into six mounds onto hot blackberry mixture cover tightly and simmer for 15
minutes or until a toothpick inserted in a dumpling comes out clean. 

Spoon in-to serving dishes. Serve with cream or whipped cream if desired.


Saturday, November 7, 2015

Spaghetti Bread Dinner


Braided Spaghetti Bread

This is a really simple recipe; it just takes a little planning for thawing the dough. It will take 2-3 hours for the bread loaf to thaw to room temperature or 1-2 hours for the rolls to thaw to room temperature.
Do you like bread and spaghetti? Twist them together with this Bradied Spaghetti Bread.
You will need:
  • 1 Loaf Rhodes Bread Dough or 12 Rhodes Dinner Rolls, thawed to room temperature
  • 6 oz spaghetti, cooked
  • 1 cup thick spaghetti sauce
  • 8 oz mozzarella cheese, cut into 1/2 –inch cubes
  • 1 egg white
  • Parmesan cheese
  • Parsley flakes

Do you like bread and spaghetti? Twist them together with this Bradied Spaghetti Bread.
Spray counter lightly with non-stick cooking spray (or use parchment paper).
Do you like bread and spaghetti? Twist them together with this Bradied Spaghetti Bread.
Roll loaf or combined dinner rolls into a 12x16-inch rectangle. Cover with plastic wrap and let rest for 10-15 minutes.
Do you like bread and spaghetti? Twist them together with this Bradied Spaghetti Bread.
Cook spaghetti according to package instructions. Drain and let cool slightly.
Do you like bread and spaghetti? Twist them together with this Bradied Spaghetti Bread.
Remove wrap from dough. Place spaghetti lengthwise in a 4-inch strip down the center of dough. Top with sauce and cheese cubes. (I mixed my spaghetti and sauce together and added a ½ pound of cooked Italian Sausage)
Do you like bread and spaghetti? Twist them together with this Bradied Spaghetti Bread.
Make cuts 1 ½-inches apart on long sides of dough to within ½-inch of filling.
Do you like bread and spaghetti? Twist them together with this Bradied Spaghetti Bread.
Begin braid by folding top and bottom strips toward filling. Then braid strips left over right, right over left. Finish by pulling last strip over and tucking under braid.
Do you like bread and spaghetti? Twist them together with this Bradied Spaghetti Bread.
Lift braid with both hands and place on large sprayed baking sheet. (or transfer parchment paper to baking sheet). Brush with egg white and sprinkle with Parmesan cheese and parsley (I added garlic powder).
Do you like bread and spaghetti? Twist them together with this Bradied Spaghetti Bread.
Bake at 350 for 30-35 minutes or until golden brown. Cool slightly and slice to serve.
Do you like bread and spaghetti? Twist them together with this Bradied Spaghetti Bread.


http://www.rhodesbread.com/blog/blog/braided-spaghetti-bread


Old Fashioned Custard Pie


Ingredients:
1 unbaked pie shell (I use Marie Callendar's deep dish)
3 large eggs
½ cup of sugar
½ teaspoon of salt
½ teaspoon of nutmeg
2-2/3 cups of milk
1 teaspoon pure vanilla extract

Ingredients:
1 unbaked pie shell (I use Marie Callendar's deep dish)
3 large eggs
½ cup of sugar
½ teaspoon of salt
½ teaspoon of nutmeg
2-2/3 cups of milk
1 teaspoon pure vanilla extract


http://cookingsalad4u.blogspot.com/2015/10/the-old-fashioned-custard-pie.html


Italian Christmas Cookies


Italian Christmas Cookies 

Sift dry ingredients. Cream butter and sugar, beat in eggs;
add vanilla and dry ingredients.


Knead and add flour as needed to keep dough from sticking to hands. 


Pinch off dough, roll in your hands to form a log and then twirl into shape. Place on greased cookie sheets. Bake at 375 for 10 minutes.

Icing
2 cup sifted confectioner’s sugar
2 tsp. vanilla
6 tsp. water
Stir until creamy

Dip cookies into icing and sprinkle with trim. Place on wire rack with wax paper on counter to collect the dripping icing and sprinkles.


Icing Alternative

1 In medium bowl, mix powdered sugar and butter with spoon or electric mixer on low speed. Stir in vanilla and 1 tablespoon of the milk. 
 
2 Gradually beat in just enough remaining milk to make frosting smooth and spreadable. If frosting is too thick, beat in more milk, a few drops at a time.

Vanilla Buttercream Frosting recipe from Betty Crocker 


MEXICAN TORTILLA CASSEROLE


MEXICAN TORTILLA CASSEROLE


·

1lb. ground beef
1/2 cup diced onion
1 pack taco seasoning mix
2 cups shredded cheddar cheese
1 can refried beans (they spread easier if you warm them in microwave)
1 cup prepared rice (I used Minute Rice)
1 can Mexican blend corn (DRAINED)will only use about 1/2 can
4-5 large flour tortillas
8 oz of thick chunky salsa (your choice mild or hot)


Spray a round cake pan or casserole with cooking spray

Brown ground beef and onion and drain 


Add taco seasonings and cook according to package direction


Lay 1 tortilla in bottom of baking dish and spread 1/3 of beans on it Top with 1/3 of the meat and sprinkle on some cheese .


2nd layer tortilla, 1/2 the rice, 1/2 salsa, 1/2 the corn and cheese


3rd layer tortilla, 1/3 beans, 1/3meat, cheese 


4 layer tortilla, beans, meat, corn, rice, salsa, and cheese


Bake covered with foil at 350 for about 40 minutes uncover and bake 10-15 minutes longer. Let sit 5 minutes before cutting . 

After baking top with sour cream,diced onion and shredded lettuce if desired


Friday, November 6, 2015

Sugar Cookie Cherry Cheesecake


Sugar Cookie Cherry Cheesecake

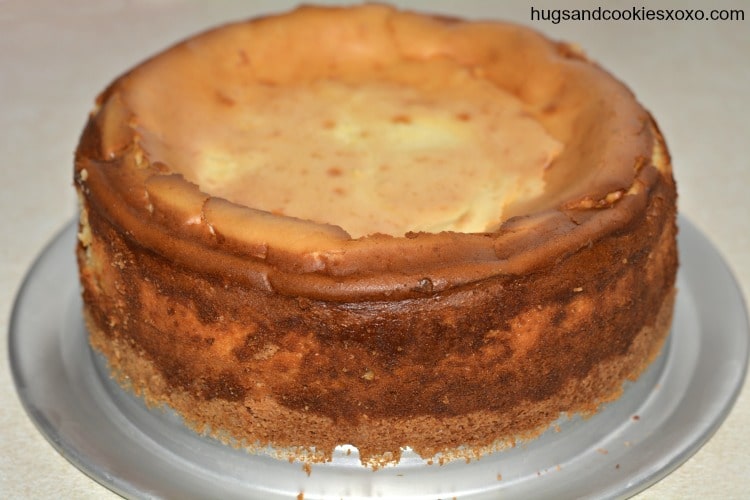
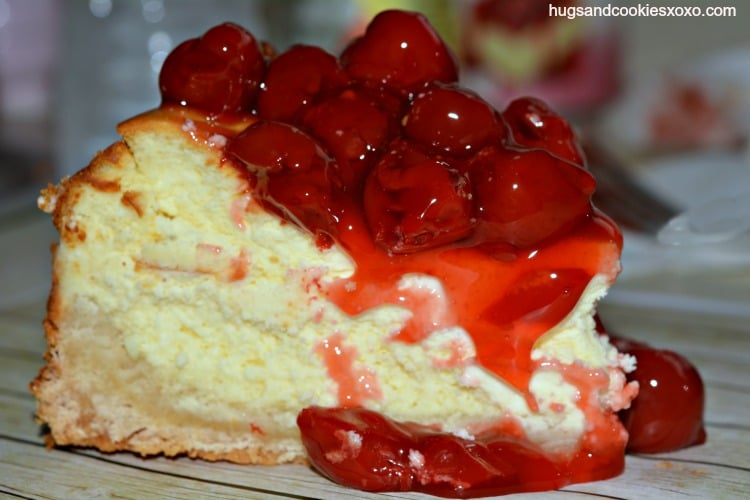
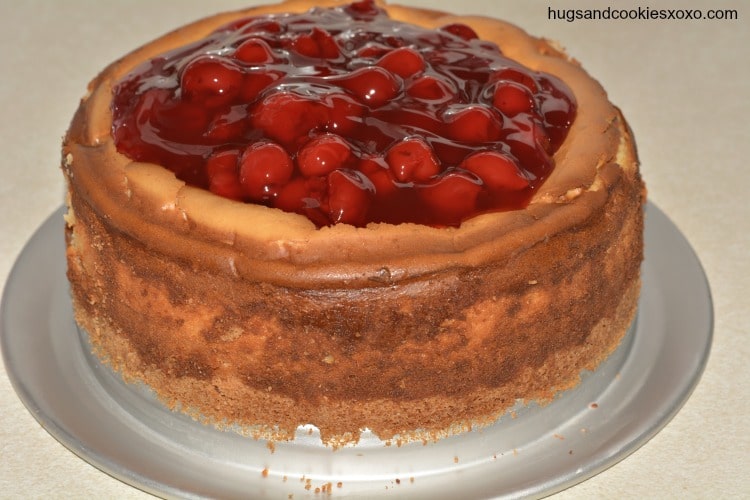
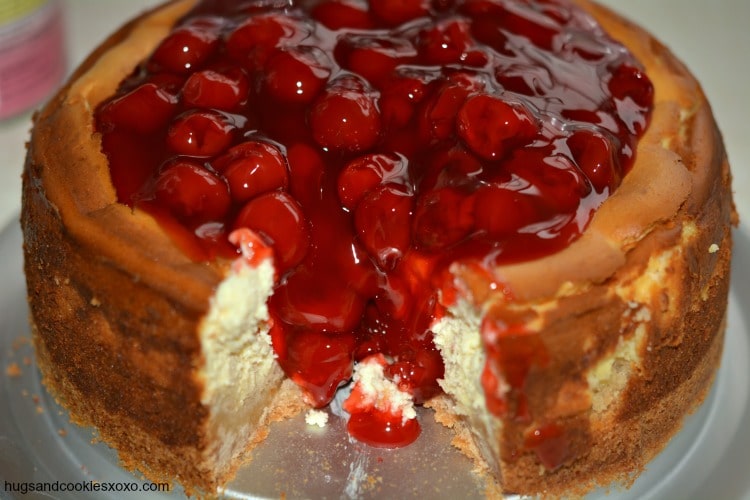
A sugar cookie crust, a thick cheesecake filling and cherries galore on top! A perfect dessert…that is, once you add some whipped cream of course!!!  Try this cherry cheesecake soon!  Thanks to the sugar cookie crust, this dessert comes together rather easily!  The filling is simple, too! Just be sure to bring your cream cheese to room temp first for easier blending!

Screen Shot 2014-06-22 at 11.45.29 AM
cherry cheesecake cheesecake-slice cheesecake-cherry cheesecake-cherries

Cherry Cheesecake


Sugar Cookie Cherry Cheesecake
Prep Time: 
Cook Time: 
Total Time: 
 
Ingredients
 
The Crust:
  • 1 - 1 lb of Pillsbury Sugar Cookie Dough, I used the mini cookie dough pieces
  • The Filling:
  • 4 - 8oz. blocks of Cream Cheese..softened
  • 4 Eggs
  • 1 tablespoon Vanilla Extract
  • 1 cup Granulated Sugar
  • 1 can cherry pie filling for the topping
Instructions
  1. Press the cookie dough into the bottom of an 8 inch springform pan and bake at 350 about 15 minutes until almost done.
  2. Let cool.
  3. Meanwhile, beat cream cheese and sugar.
  4. Add vanilla and one egg at a time, beating well.
  5. Pour into crust.
  6. Lower oven to 325 and bake 75-90 minutes until cooked through and browned.
  7. Chill overnight in fridge and top with canned cherry pie filling.
  8. Mmmmmmm!


Adapted From Oh, Bite It! Love her blog-check it out!!!!

CHERRYCHEESECAKE


http://hugsandcookiesxoxo.com/2014/06/sugar-cookie-cherry-cheesecake.html


Red Velvet Cheesecake


Red Velvet Cheesecake

Oct 29, 2015 at 1:20 pm | By

Oh, it’s not your typical red velvet flavored cheesecake, it’s creamy cheesecake layered with spongy red velvet cake. You can impress your family and friends with your baking skills. Or you can just eat the entire thing yourself, which I probably will do.

Don’t be fooled by the amount of steps. It make take longer than baking a traditional cake, but it’s pretty easy and well worth the effort.


imgur red velvet cheesecake
Source: Imgur

Red Velvet Cheesecake

Difficulty: intermediate Yield: 12 servings

Prep  mins
Cook  mins
Ready In  mins
One of the best dessert mash-ups you can bake.

Ingredients:

Directions:

1For the cheesecake: Preheat oven to 325 degrees. Set a kettle of water on to boil.
2Using an electric mixer, beat 20 ounces of the cream cheese on medium until fluffy while scraping down the sides of the bowl. Gradually add 3/4 cup of the sugar, beating until fluffy. Beat in lemon juice and 1/4 teaspoon of salt. Beat in two of the eggs, one at a time, scraping down the side of the bowl after each. Beat in the sour cream.
3Spray your cake pan with non-stick spray. Cut parchment paper in a circle and line the bottom of the cheesecake pan. Spray the parchment.
4Wrap bottom half of pan in foil.
5Pour cheesecake batter in the cake pan and place that in a larger, oven safe pan. Pour in boiling water in the outer pan to come halfway up side of the inner pan.
6Bake until just set in center, about 45 minutes.
7Remove pan from water. Let cool for approximately 20 minutes. Run a knife around edge and continue to cool completely. Carefully place a plate on top of cooled cheesecake layer and flip it over onto plate. Remove parchment paper. Cover in plastic wrap and freeze. 


8For the red velvet cake: Preheat oven to 350°.
9Sift together flour, remaining white sugar, baking soda, cocoa, and 1 teaspoon salt into a medium bowl.
10Beat 2 eggs, oil, buttermilk, food coloring, 2 teaspoons of the vanilla, and vinegar in a large bowl with an electric mixer until well combined.
11Add dry ingredients and beat until smooth, about 2 minutes.
12Divide batter evenly between 2 greased and floured 9" round cake pans and bake 25-30 minutes, rotating halfway through, until a toothpick inserted in the center of each cake comes out clean.
13Let cakes cool for 5 minutes, then invert each onto a plate, then invert again onto a cooling rack. Let cakes cool completely. If needed, level them off with a serrated knife so they are flat. 


14For the frosting: Beat 12 ounces of the cream cheese, butter, and the remaining vanilla together in a large bowl with an electric mixer until combined. Add confectioners sugar and beat until frosting is light and fluffy, 5–7 minutes. 


15Assembly: Place bottom layer on cake stand. Remove cheesecake from freezer, unwrap and place cheesecake layer on top of the bottom layer of the red velvet cake. If the cheesecake is wider than the cake, and it is necessary to trim it, wait about 10 minutes for the cheesecake to soften, then trim it with a knife. Place the top layer of cake on top of the cheesecake, and coat with a generous layer of the cream cheese frosting. 

16Refrigerate approximately 30 minutes, then frost with as much of the remaining frosting as necessary.
17Refrigerate until ready to serve. Enjoy!

Wednesday, October 28, 2015

Apple Cinnamon Dump Cake from Mr. Food


Apple Cinnamon Dump Cake


What You'll Need:

  • 2 (21-ounce) cans apple pie filling
  • 1 (16.5-ounce) box yellow cake mix
  • 1/2 cup cinnamon chips
  • 1/2 cup chopped walnuts
  • 2 teaspoons ground cinnamon
  • 1/2 cup (1 stick) butter, melted
What To Do:


  • Preheat oven to 350 F.  Coat a 9- x 13-inch baking dish with cooking spray. Spoon pie filling into baking dish.
  • In a medium bowl, combine cake mix, cinnamon chips, walnuts, and cinnamon. Sprinkle dry mixture evenly over pie filling, then drizzle with butter.
  • Bake 45 to 50 minutes, or until golden brown and bubbly. Serve warm or cold.
Notes
Top with vanilla ice cream or whipped cream.
 Serves 12
Cook Time  45 Min. 

Sunday, October 25, 2015

Earthquake Cake


Earthquake Cake

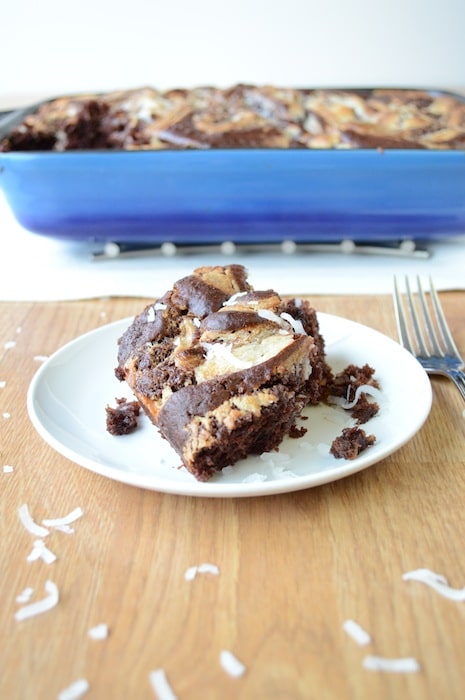
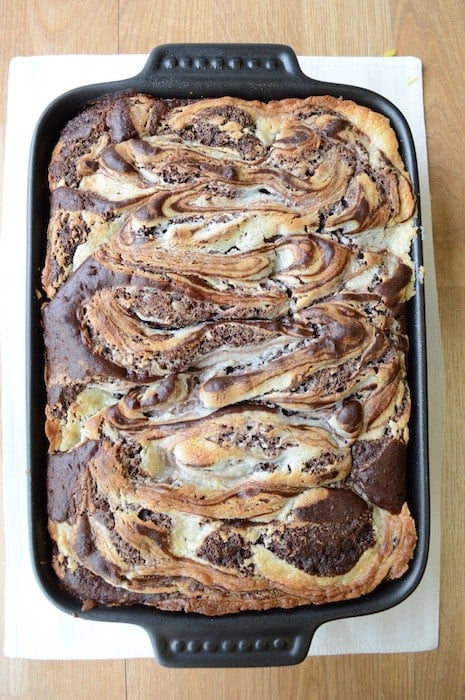
This is a must try and one of our most popular recipes! German chocolate cake mix with chocolate chips, coconut, pecans and a secret swirl layer!
Hold on to your seat because things are about to rumble – it’s the Earthquake Cake!
I’m not really sure how this cake got its name, but it’s rich with german chocolate flavor,  pecans, coconut, and the secret ingredient – a powdered sugar, cream cheese, and butter swirl layer. It’s amazing and a lot of you agree with me based on your comments!
This is a must try and one of our most popular recipes! German chocolate cake mix with chocolate chips, coconut, pecans and a secret swirl layer!

How to assemble the cake..
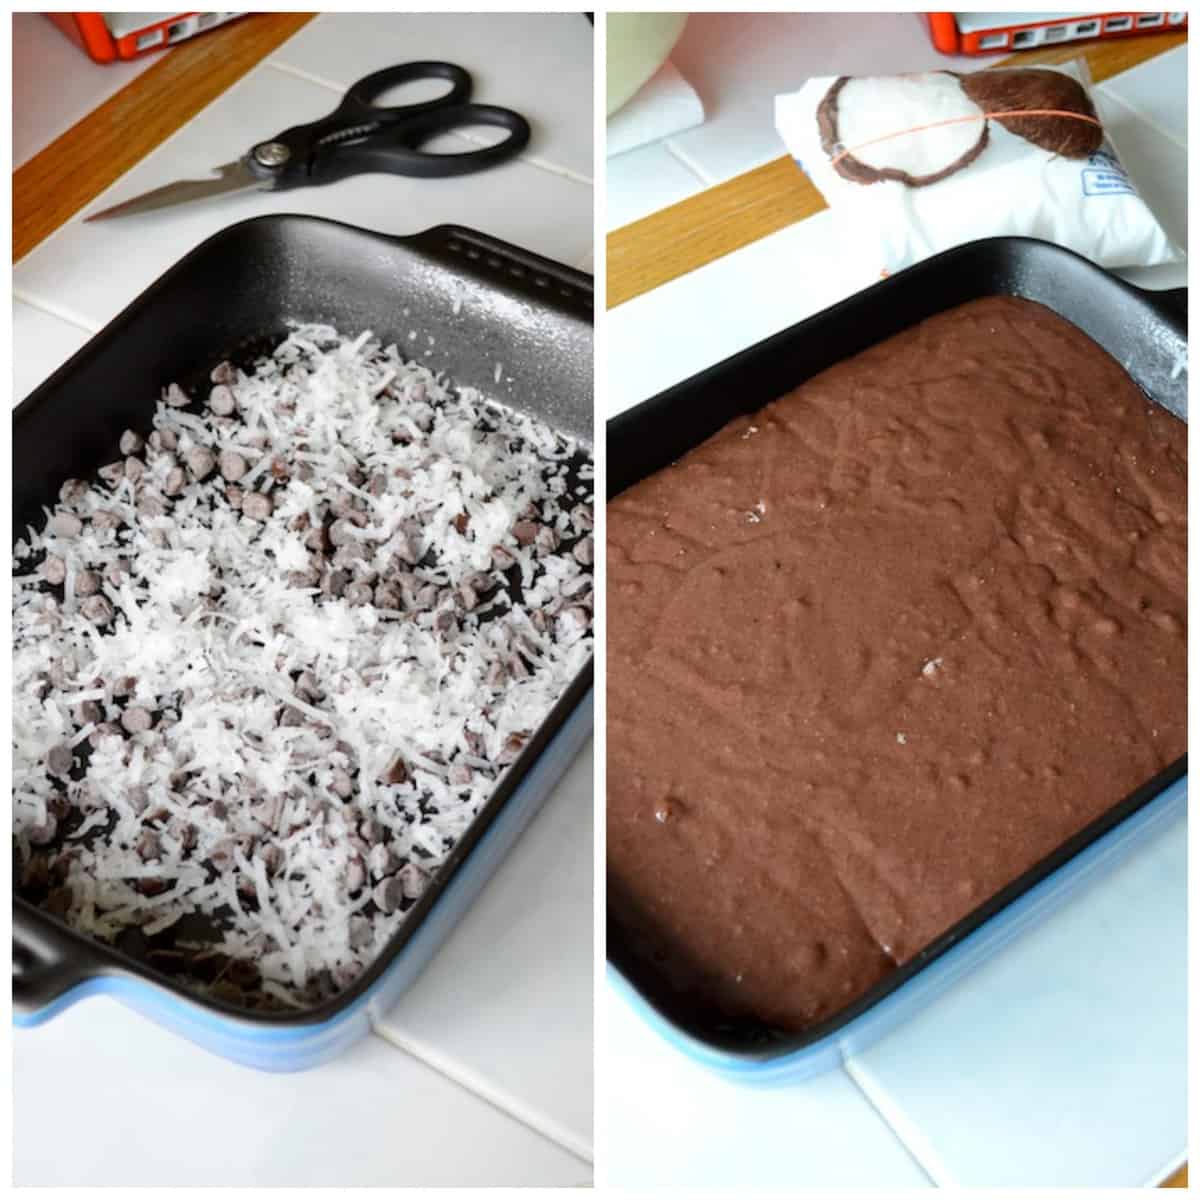
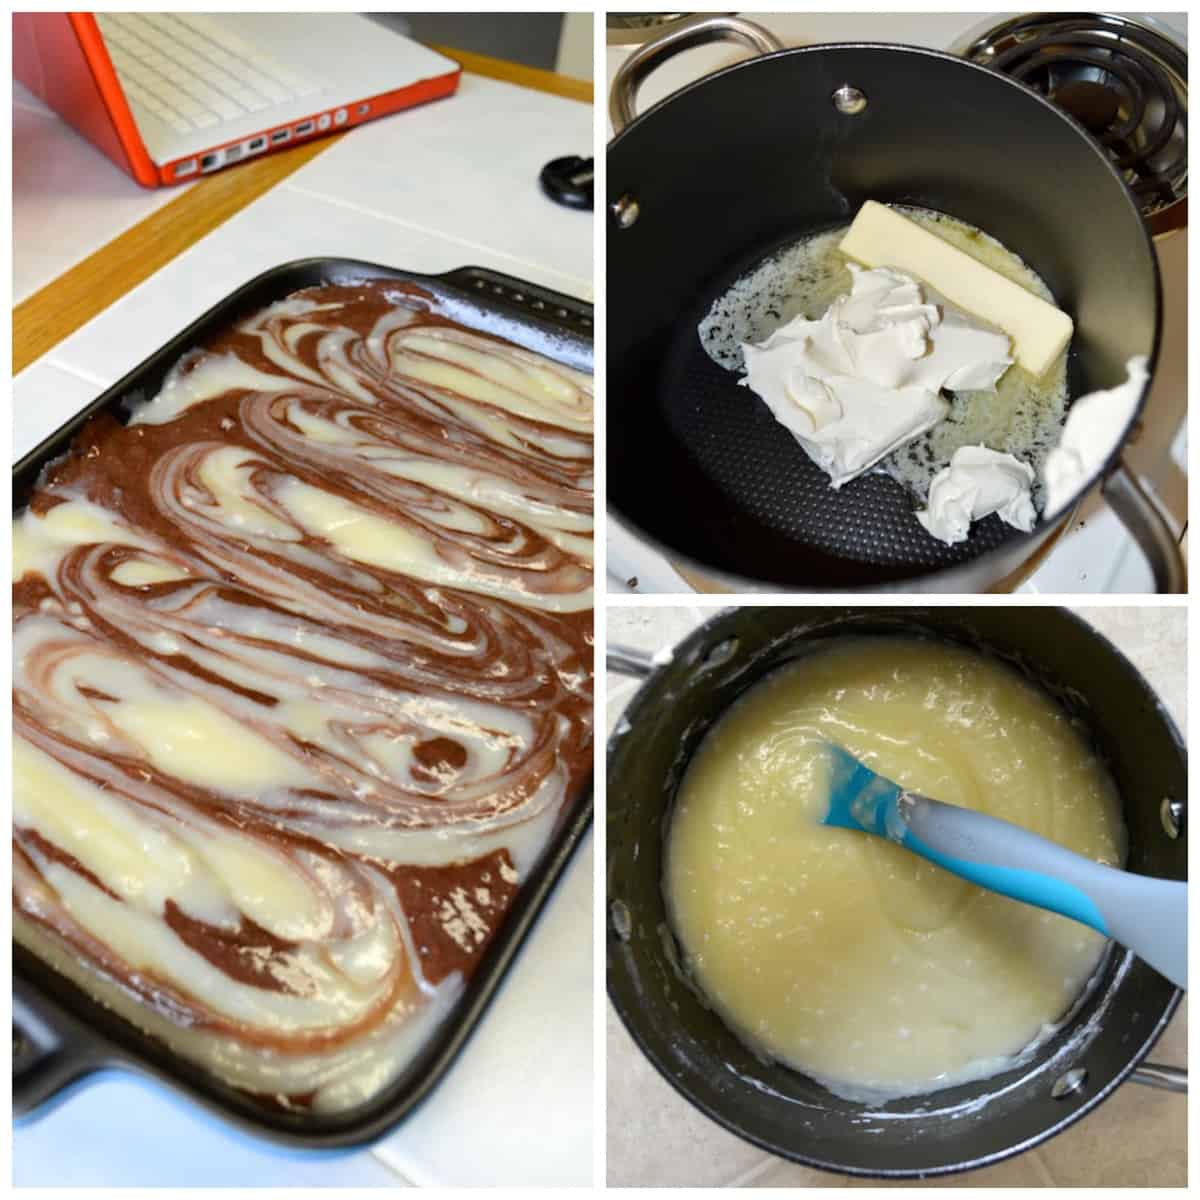
Layer #1 (on the left) – chocolate chips, pecans, and coconut, and layer #2 (on the right) german chocolate cake mix

This is a must try and one of our most popular recipes! German chocolate cake mix with chocolate chips, coconut, pecans and a secret swirl layer!

Layer #3 – the swirled butter, cream cheese, powdered sugar goodness.

This is a must try and one of our most popular recipes! German chocolate cake mix with chocolate chips, coconut, pecans and a secret swirl layer!

I think I overcooked mine slightly because the end result is suppose to be a bit more gooey and not completely cake-like, so be sure to watch your cooking time! But nevertheless this earthquake cake was phenomenal and was the talk of the night at our pot luck.

This is a must try and one of our most popular recipes! German chocolate cake mix with chocolate chips, coconut, pecans and a secret swirl layer! This is a must try and one of our most popular recipes! German chocolate cake mix with chocolate chips, coconut, pecans and a secret swirl layer!


http://thefirstyearblog.com/earthquake-cake/


Wednesday, October 14, 2015

Pumpkin Cheesecake Mousse Wrapped in Crunchy "Spiderwebs"


Pumpkin Cheesecake Mousse wrapped in Crunchy "Spiderwebs"

Technically, many brandy snap recipes do not actually have brandy in them. These for example were made with rum….. potAto, potaato. Many have no alcohol at all and they all work just fine… once you get the hang of these crunchy critters.

I like doing this kind of thing around Samhain as they remind me of spiderwebs, hence the name.

Spiders have a strong mythological connection to time and esoteric wisdom. In some traditions this connection to time also means history, memory and past patterns. Once woven into the tapestry of the loom of creation and no longer active as the shuttle works its way back and forth across the strands of life, the Weaver remembers and as Samhain approaches and the veil between thins once more, this is an excellent time to join Her in that remembering.

For the “brandy snaps” you will need:

1/4 cup butter
1/4 cup brown sugar
2 Tbsp. maple syrup
1 tsp. lemon zest and you can use orange as well
1 – 1 1/2 tsp spice, more on that below
1 Tbsp. rum
5 Tbsp. flour

Deep breath in and hold for a moment, release, repeat. “Spinning your magic with glittering strands. I work with like power through loving hands. A home and a hearth I hold here in Love, with you at my window ensconced above. Wisdom, protection, I ask you to share. I return blessings that well may you fare. Grandmother Weaver please act as my guide, as forth on my journey I stumble and stride. Show me sight true, that clear I might see, with harm to none So Mote It Be” Begin..

DSCN2218 

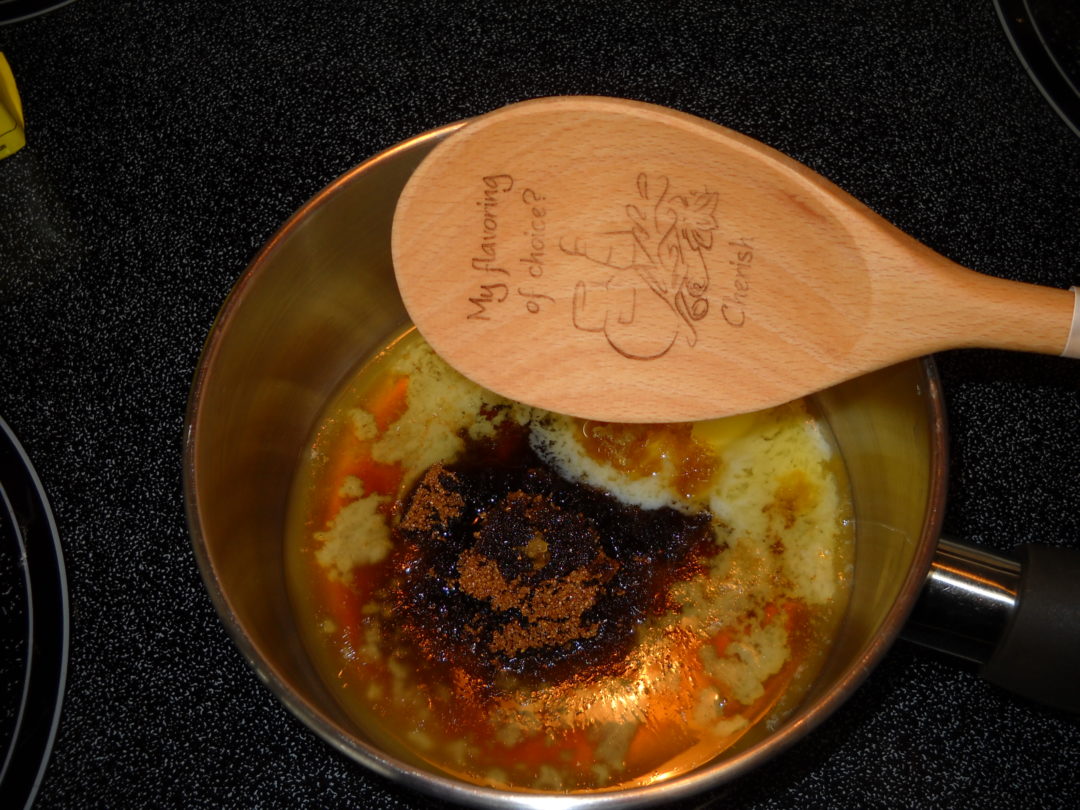
Melt the butter in a small pot and add the sugar, zest, rum, maple syrup and mix well. Add the spice and flour and mix again until the batter is smooth.

I have made these with cinnamon and ginger and pumpkin pie spice and I think the real question to help you decide is, ” what filling am I putting inside?”. I use 1tsp. of ginger and am happy with the flavour but that might be too much for another persons pallet.

DSCN2220 

Now comes the fun part. If you have not made these before or it has been awhile, I would suggest that the supplies for making a second batch be available. That is not to say they are difficult but they do require watching and if you get pulled away, as I did, and don’t set the timer, as I didn’t, it is very possible to loose focus and burn the first tray in the oven, as I did.

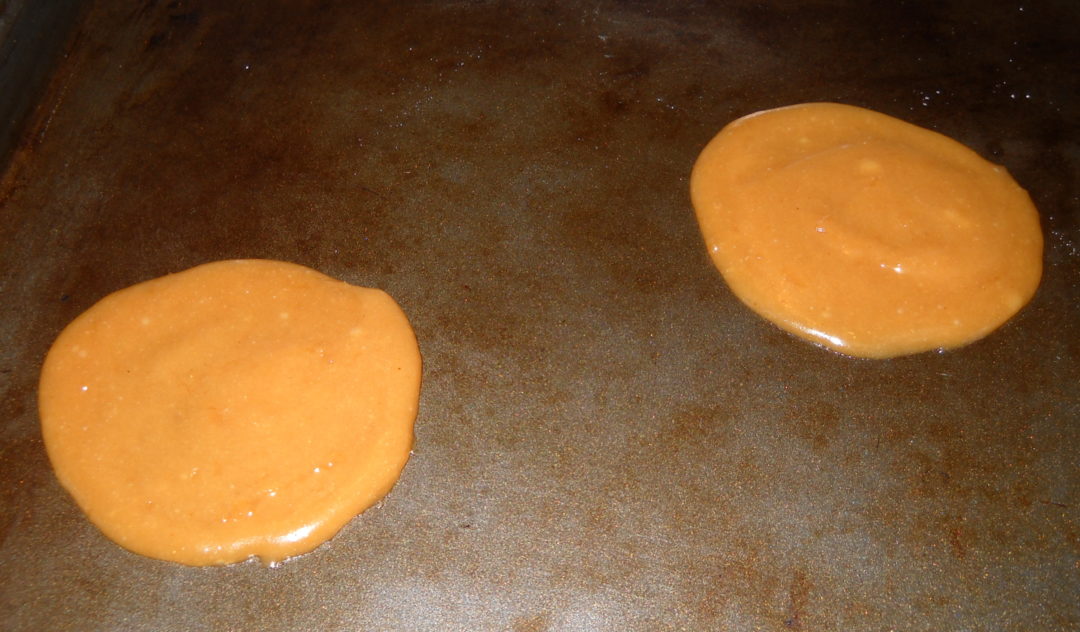
Drop by tablespoon fulls onto an ungreased cookie sheet. I would suggest that you do not do more than four cookies at a time and definitely fewer on the first run through. You might also need to spread them out with the back of the spoon a little bit.

The colour of your tray will make a difference in the baking time. Dark trays will bake product more quickly. Your oven may have a slightly different temperature so the length of time needed to bake might need adjusting by a minute or two and these are cookies that you can loose with a minute too long in the oven.

DSCN2226 

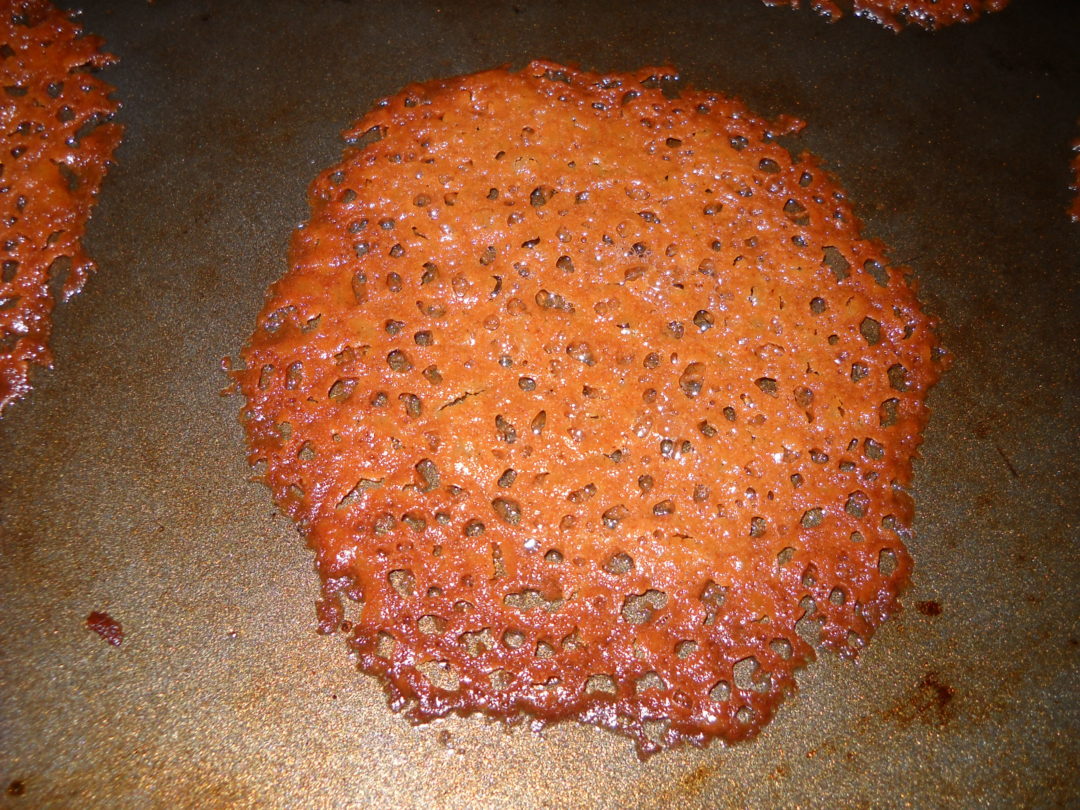
Other things can affect the baking time as well. If for example you were to substitute honey for the maple syrup you will find the cookies spread more and the baking time will shorten. Remember that once the tray comes out of the oven, the cookies will continue baking. Try for darker edges with a little lightness still in the center.

DSCN2227 

I baked these at 350 degrees for 5 minutes and then let them sit out for 90 seconds before taking them off the cookie tray. You want them to be hard enough to hold their shape and soft enough to be able to affect their shape. If the cookies get too hard, it is possible to put them back in the oven for a short time to “re-soften” the cookie before trying again.

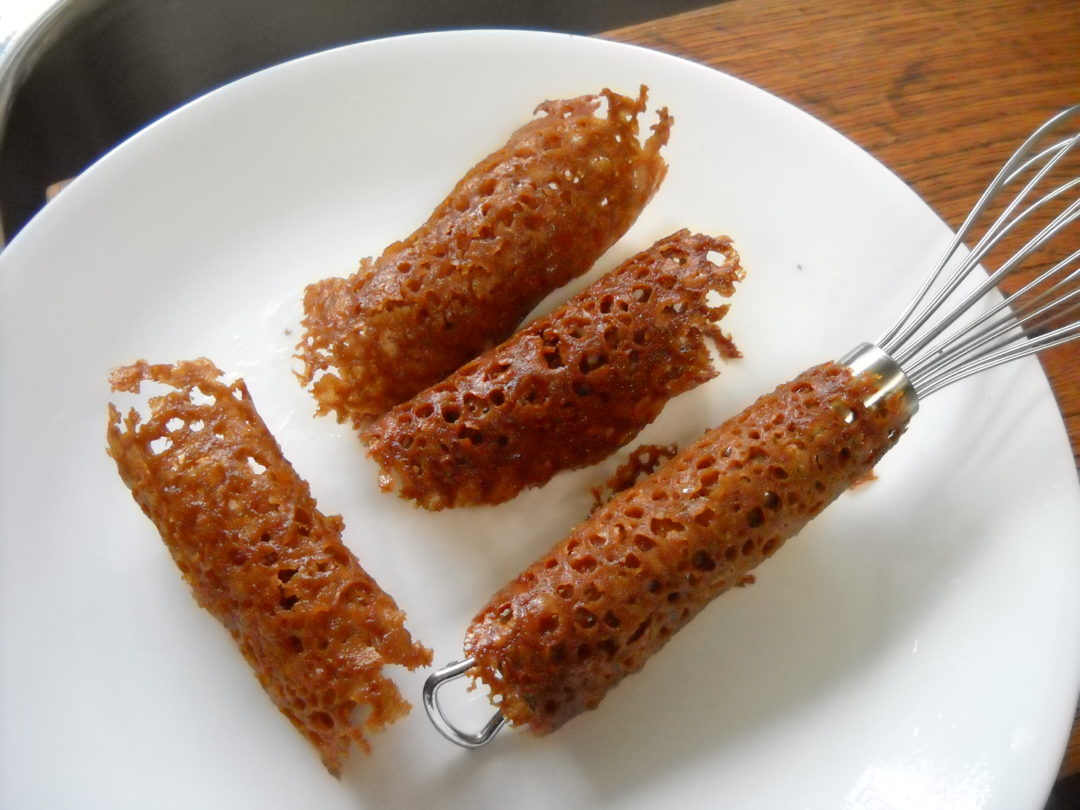
I used a wide handled whisk to roll the cookies around but anything that will give you a 3/4 – 1 inch center will do the job. Once each cookie is rolled allow to cool and harden.

Refill the cookie tray and bake the next batch. This recipe gave me nine cookies and they will store in an airtight container for over a week, so this is something you can do in advance and then leave the filling till just before serving if you want your spiderwebs crisp or about an hour before serving, if you would like them a little softer.


For the pumpkin cheesecake filling you will need:

4 ounces cream cheese, at room temperature
1/4 cup pure maple syrup
1/2 teaspoon ground cinnamon
1/2 teaspoon ground nutmeg
1/4 teaspoon ground ginger
1/4 teaspoon ground cloves
1/4 cup plain Greek yogurt
6 Tbsp. pumpkin puree
1 cup whipped cream (already whipped)

Place the unwhipped whipping cream in a container and beat until firm peaks appear.

DSCN2237 

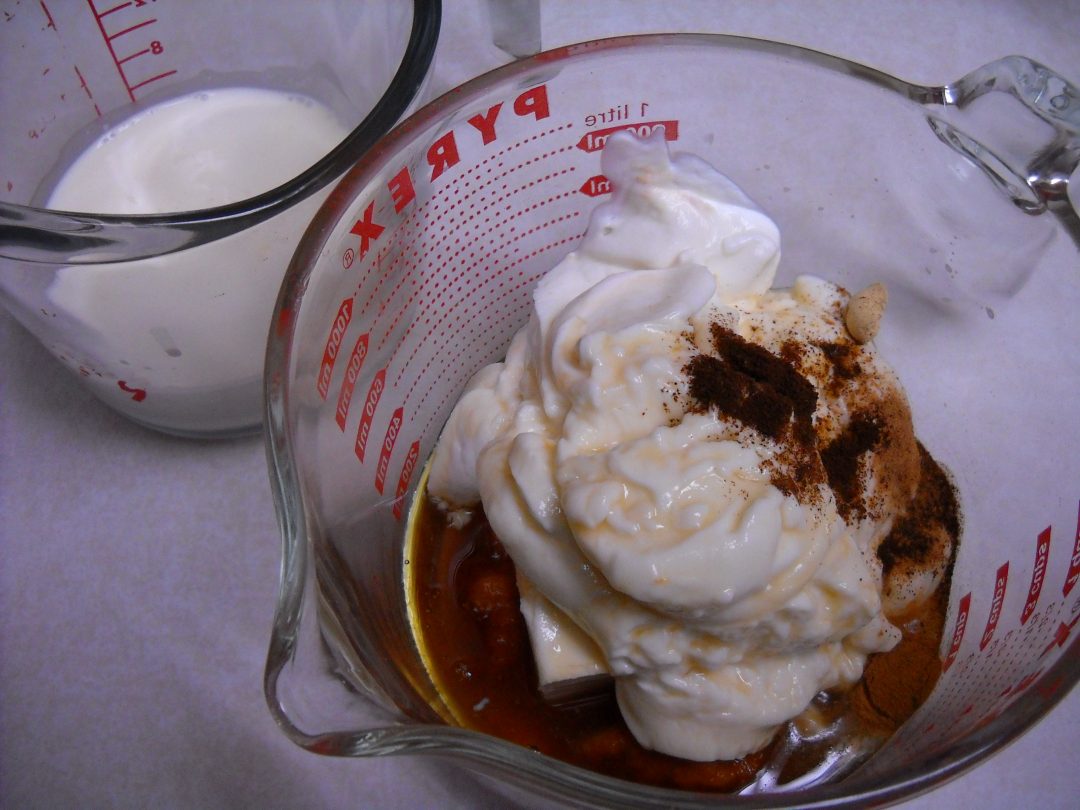
Place all the other ingredients in a bowl and whip at a high enough speed to completely blend the ingredients smooth.

Fold the whipped cream into the pumpkin mixture and cool for at least one hour. Over night will not harm it all.
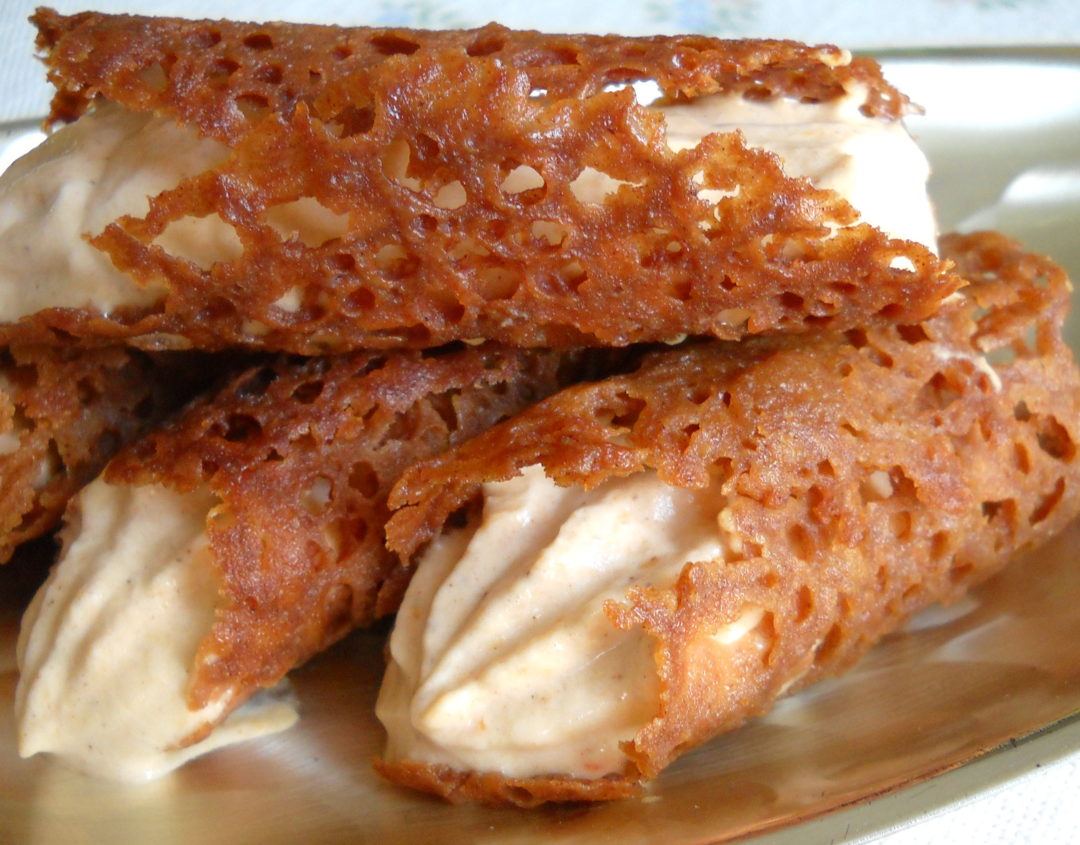
Just before serving, pipe filling into the cookie. A piping bag is helpful. You can pipe from both ends or hold the cookie vertically so the mousse will continue to fall further into the cookie as you continue to pipe. Just make sure you keep an eye on what is happening at the other end.
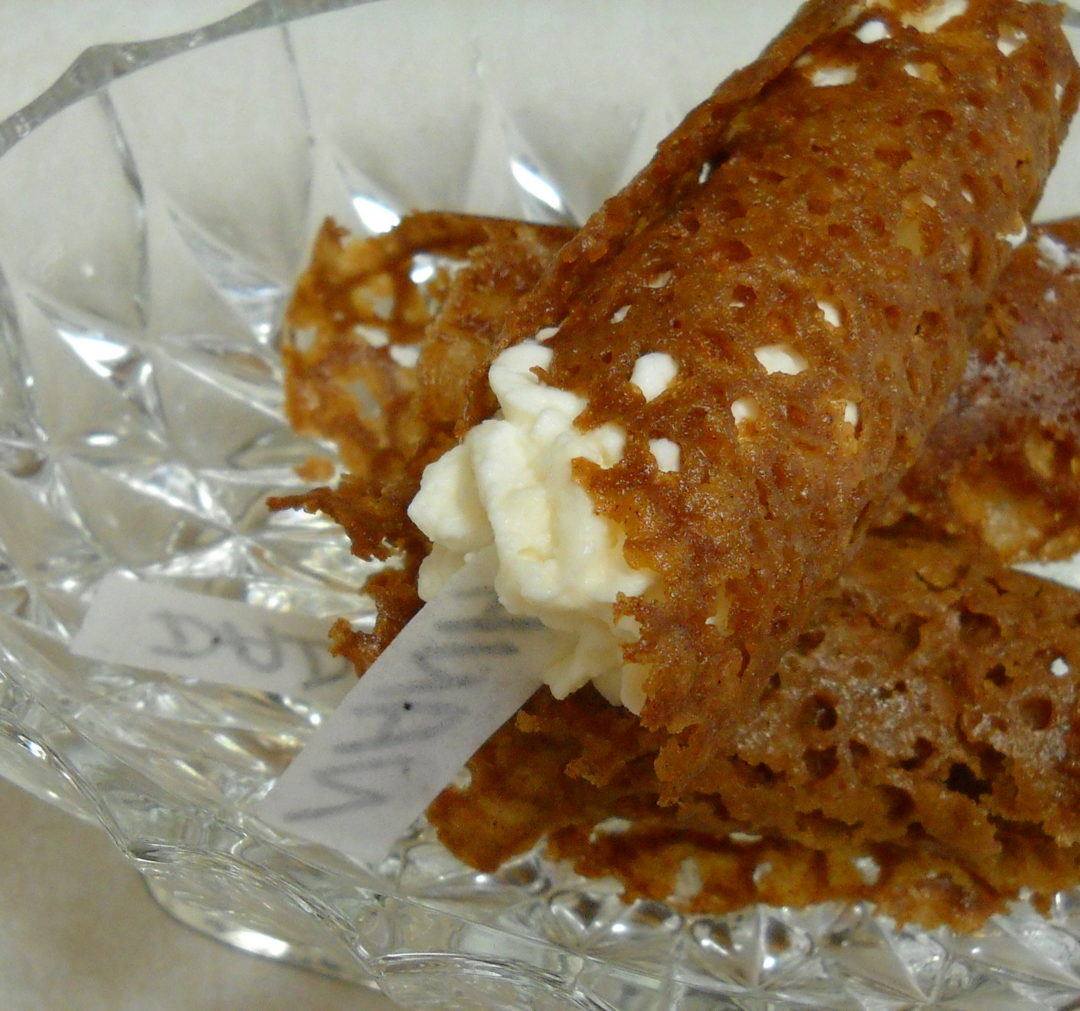
In my original recipe I used double the amount of Greek yogurt before I realized I didn’t need to make the full batch. I found it too soft (as you can see below) and too tangy for my taste so I cut the yogurt in half in the recipe above.

DSCN2279 

If you are celebrating Samhain or Día de Muertos together as a family, here is a suggestion for taking these treats to another level.
Cut little strips of rice paper in 1/2 inch by 2 1/2 inch strips or there about. Using a food colouring edible marker, write the name of an ancestor at one end. If the name comes up more than once in order to put a name in each dessert, that is absolutely fine.

Just before serving, gently push the strip into the filling, leaving the name outside the filling as a tag. Place the filled spider webs with the names upside down on a serving plate so that no one can see who they are choosing. (I used black here so you could see the names in the picture but ideally, use a yellow or something light.)
Have everyone tell a story or something they remember about the person they chose. It does not have to be personal experience, it can be a retelling of a family legend or an acknowledgement of an heirloom or physical trait received, or just a funny story that has become part of your families memories.

Samhain is a fire festival. In native traditions Grandmother Spider is credited with bringing fire and sun to the people, making Her stories quite apropos for this time of the year. Her adventures teach, determination and preparedness through the skills of pottery and weaving.

In other traditions, She teaches that each of us has a place in the loom of creation and that each choice we make is important.

DSCN2349 cropped 

Please check out our selection of kitchen wands, spurtles and tea towels. After Samhain comes Yule, in no time at all!

 http://mykitchenwand.com/pumpkin-cheesecake-mousse-wrapped-in-crunchy-spiderwebs/