Tuesday, July 26, 2016

Perfect Omelet


How Legendary French Chef Jacques Pépin Makes A Perfect Omelette

The secret ingredients are butter and charm.

Lauren Zaser/Alice Mongkongllite / Via BuzzFeed

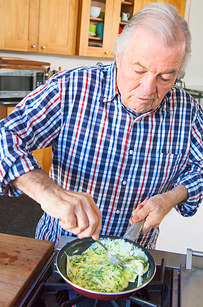
This is Jacques Pépin.
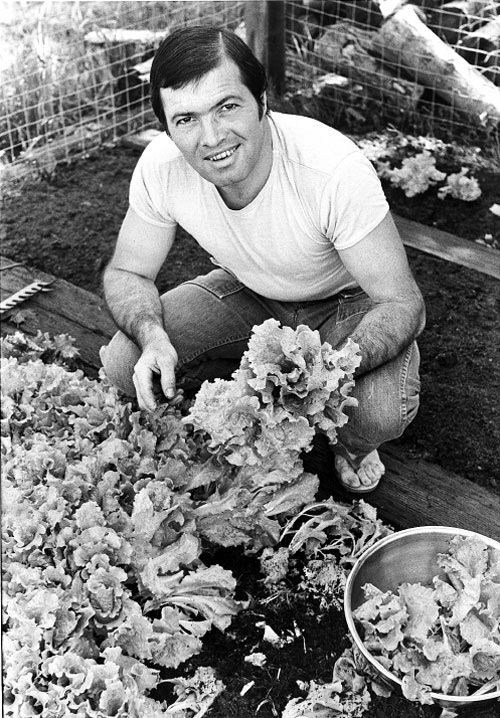
This is Jacques Pépin.
Jacques Pépin / Via Jacques Pépin
Charming AF.

Jacques Pépin is one of the most famous chefs in the world. He basically invented the job of TV chef, was BFFs with Julia Child, and has been cooking professionally longer than most of us have been alive.

Jacques Pépin is one of the most famous chefs in the world. He basically invented the job of TV chef, was BFFs with Julia Child, and has been cooking professionally longer than most of us have been alive.
Angela Appetta / Via behance.net
Not to mention he’s owned multiple restaurants, won a James Beard Lifetime Achievement Award, and is generally just a total badass.

There is literally no one more qualified to demonstrate how to make the PERFECT OMELETTE. This one is the classic French variety, which means you’ll need only eggs, butter, salt, pepper, and lots of fresh herbs.

For the full recipe, jump to the bottom of this post.
Unlike a “Western-style” omelette, this one will NOT be stuffed with cheese and ham, sorry.

First, let’s talk about the one tool you really need: the skillet. To make a perfect omelette, you need an 8-inch nonstick skillet. It’s non-negotiable.
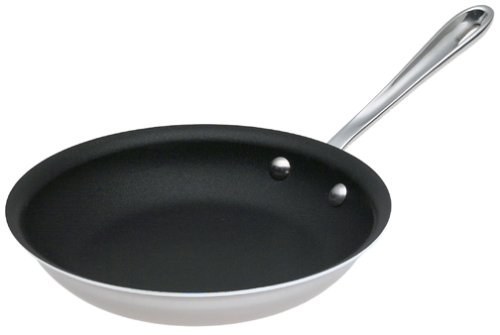
First, let's talk about the one tool you really need: the skillet. To make a perfect omelette, you need an 8-inch nonstick skillet. It's non-negotiable.
You can find one at pretty much any store (Target, Bed Bath & Beyond, Williams Sonoma) and, of course, Amazon.
If you already have an 8-inch nonstick skillet, give it a good look. If it has lots of scratches and scrapes, you might want to consider retiring it.
That’s it. A skillet and a fork. SO EASY.

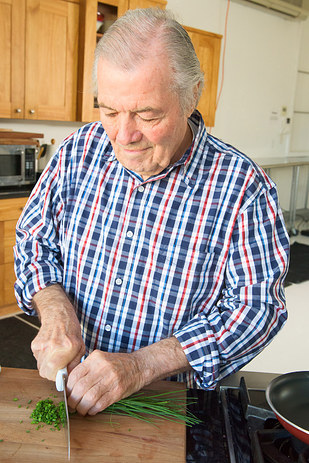
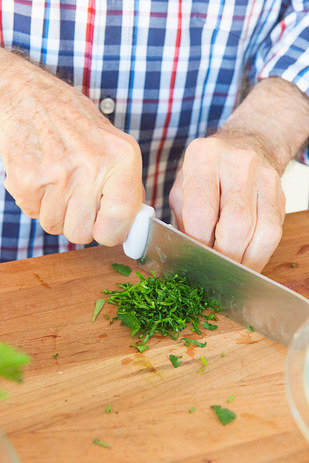
1. To start, chop some herbs. Jacques uses a mix of “fines herbs,” which includes chives, parsley, tarragon, and chervil.
Lauren Zaser
BuzzFeed
You can use any mix of these four, or just one. Either way, you’ll want about ¼ cup of finely chopped fresh herbs total.

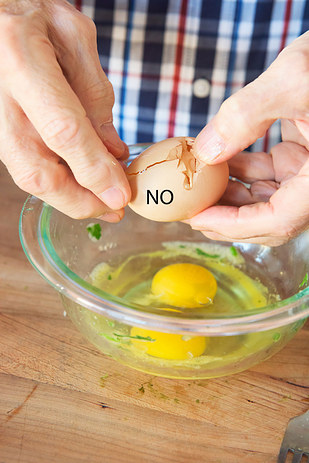
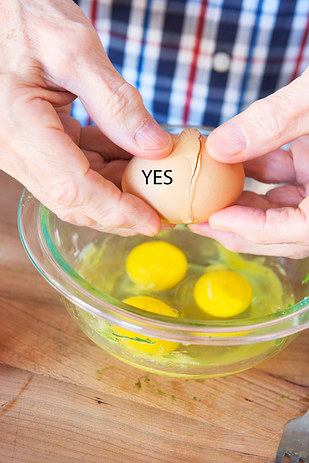
2. Next, crack 3 eggs into a bowl. Jacques stresses the importance of cracking them on a surface (like your counter or cutting board), rather than the edge of the bowl.
Lauren Zaser / Via BuzzFeed
“When you crack on the bowl, the shell gets pushed inside the egg, not good,” Jacques says.

3. Before you whisk the eggs, pierce the yolks with a fork; this makes it much easier to blend everything together.
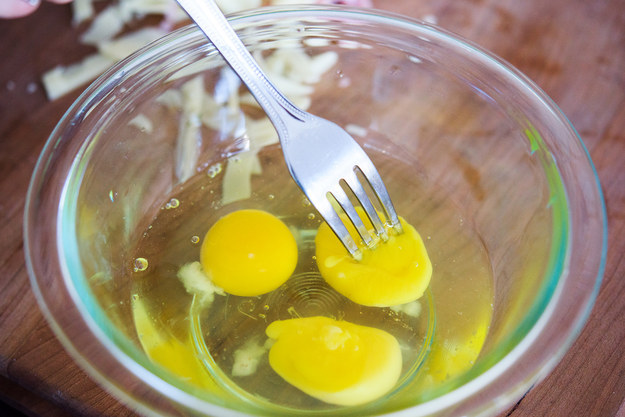
Before you whisk the eggs, pierce the yolks with a fork; this makes it much easier to blend everything together.
Lauren Zaser / Via BuzzFeed

4. Season the eggs with salt and pepper and add the herbs. Whisk everything together super vigorously. “Don’t go slowly here,” Jacques says.
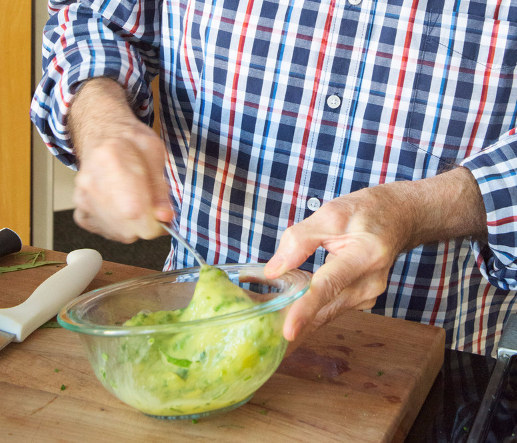
Season the eggs with salt and pepper and add the herbs. Whisk everything together super vigorously. "Don't go slowly here," Jacques says.
Lauren Zaser / Via BuzzFeed
He uses a fork, which is great because who even has a whisk that tiny? Not Jacques Pépin, that’s who.

5. The eggs need to be REALLY well-blended. You can tell they are REALLY well-blended when you lift the fork and then the eggs come streaming down, the yolks and whites together in sweet eggy harmony.
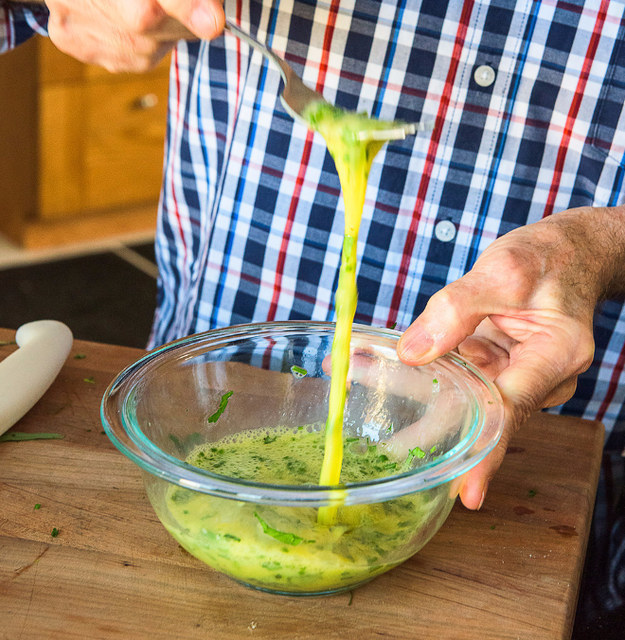
The eggs need to be REALLY well-blended. You can tell they are REALLY well-blended when you lift the fork and then the eggs come streaming down, the yolks and whites together in sweet eggy harmony.
Lauren Zaser / Via BuzzFeed
Jacques says: “No streaks of white or yolk! So important.”

6. Now it’s time to cook the omelette. Like everything great in life, a perfect omelette has lots of butter.
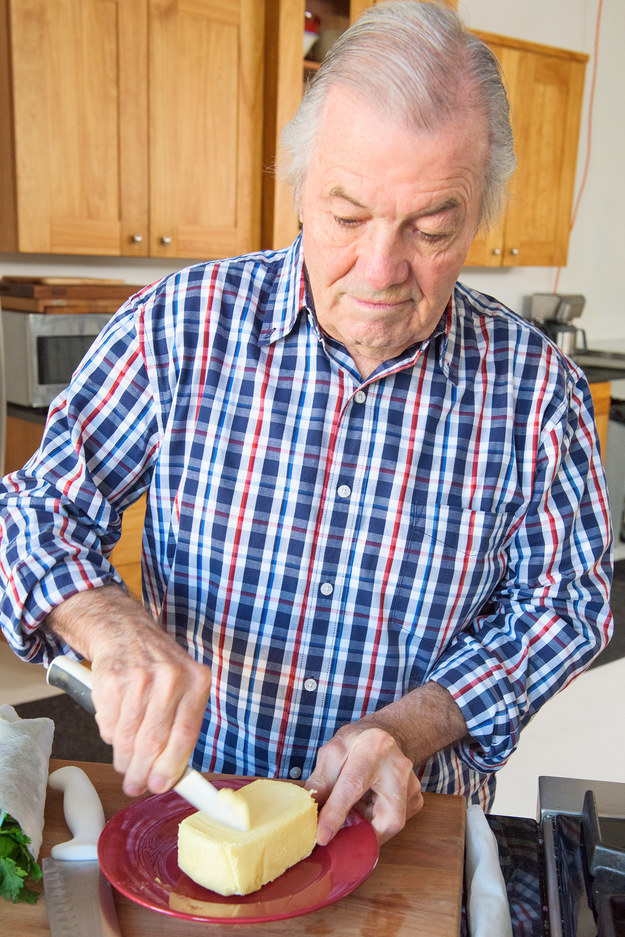
Now it's time to cook the omelette. Like everything great in life, a perfect omelette has lots of butter.
Lauren Zaser / Via BuzzFeed
If possible, the butter should always be unsalted and European-style (that just means it has EXTRA FAT). Plugra, Kerrygold, and Organic Valley make good varieties.

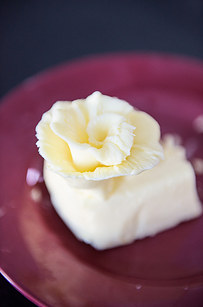
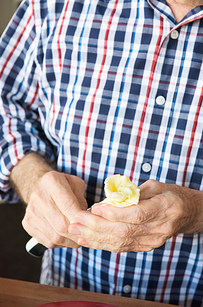
If you’re Jacques Pépin, you might want to shave a little butter off the top and twirl it into a rose.
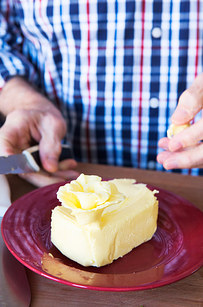
Lauren Zaser
BuzzFeed
Definitely optional.

7. Put the skillet over medium heat and add about 2 tablespoons of that butter. The butter should sizzle a little, but not furiously. It should melt quickly.
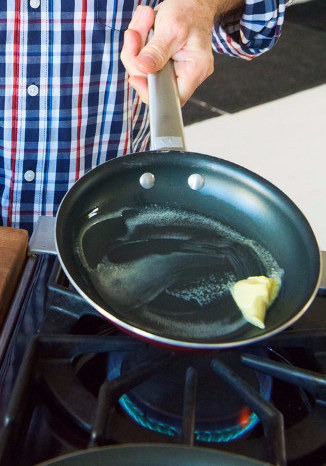
Put the skillet over medium heat and add about 2 tablespoons of that butter. The butter should sizzle a little, but not furiously. It should melt quickly.
Lauren Zaser / Via BuzzFeed
Pro tip: If the skillet gets too hot, just remove it from the flame — do not adjust the flame itself.

8. Add the eggs to the skillet all at once, scraping out every last bit with the side of the fork.
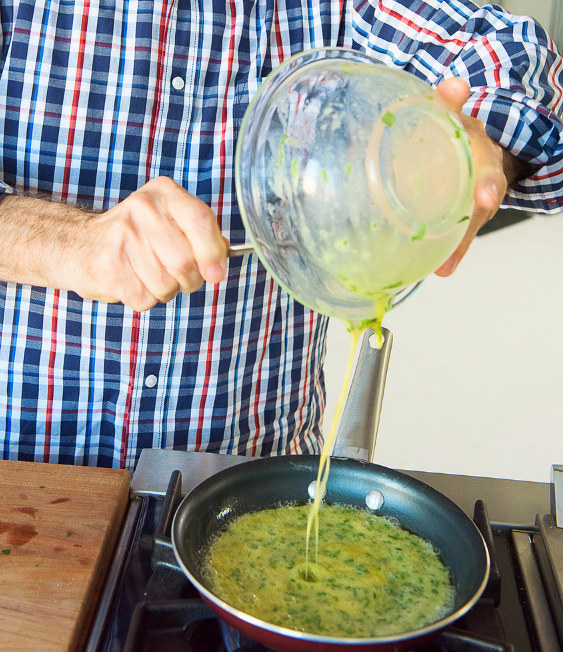
Add the eggs to the skillet all at once, scraping out every last bit with the side of the fork.
Lauren Zaser / Via BuzzFeed

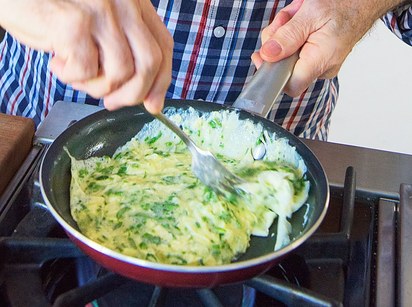
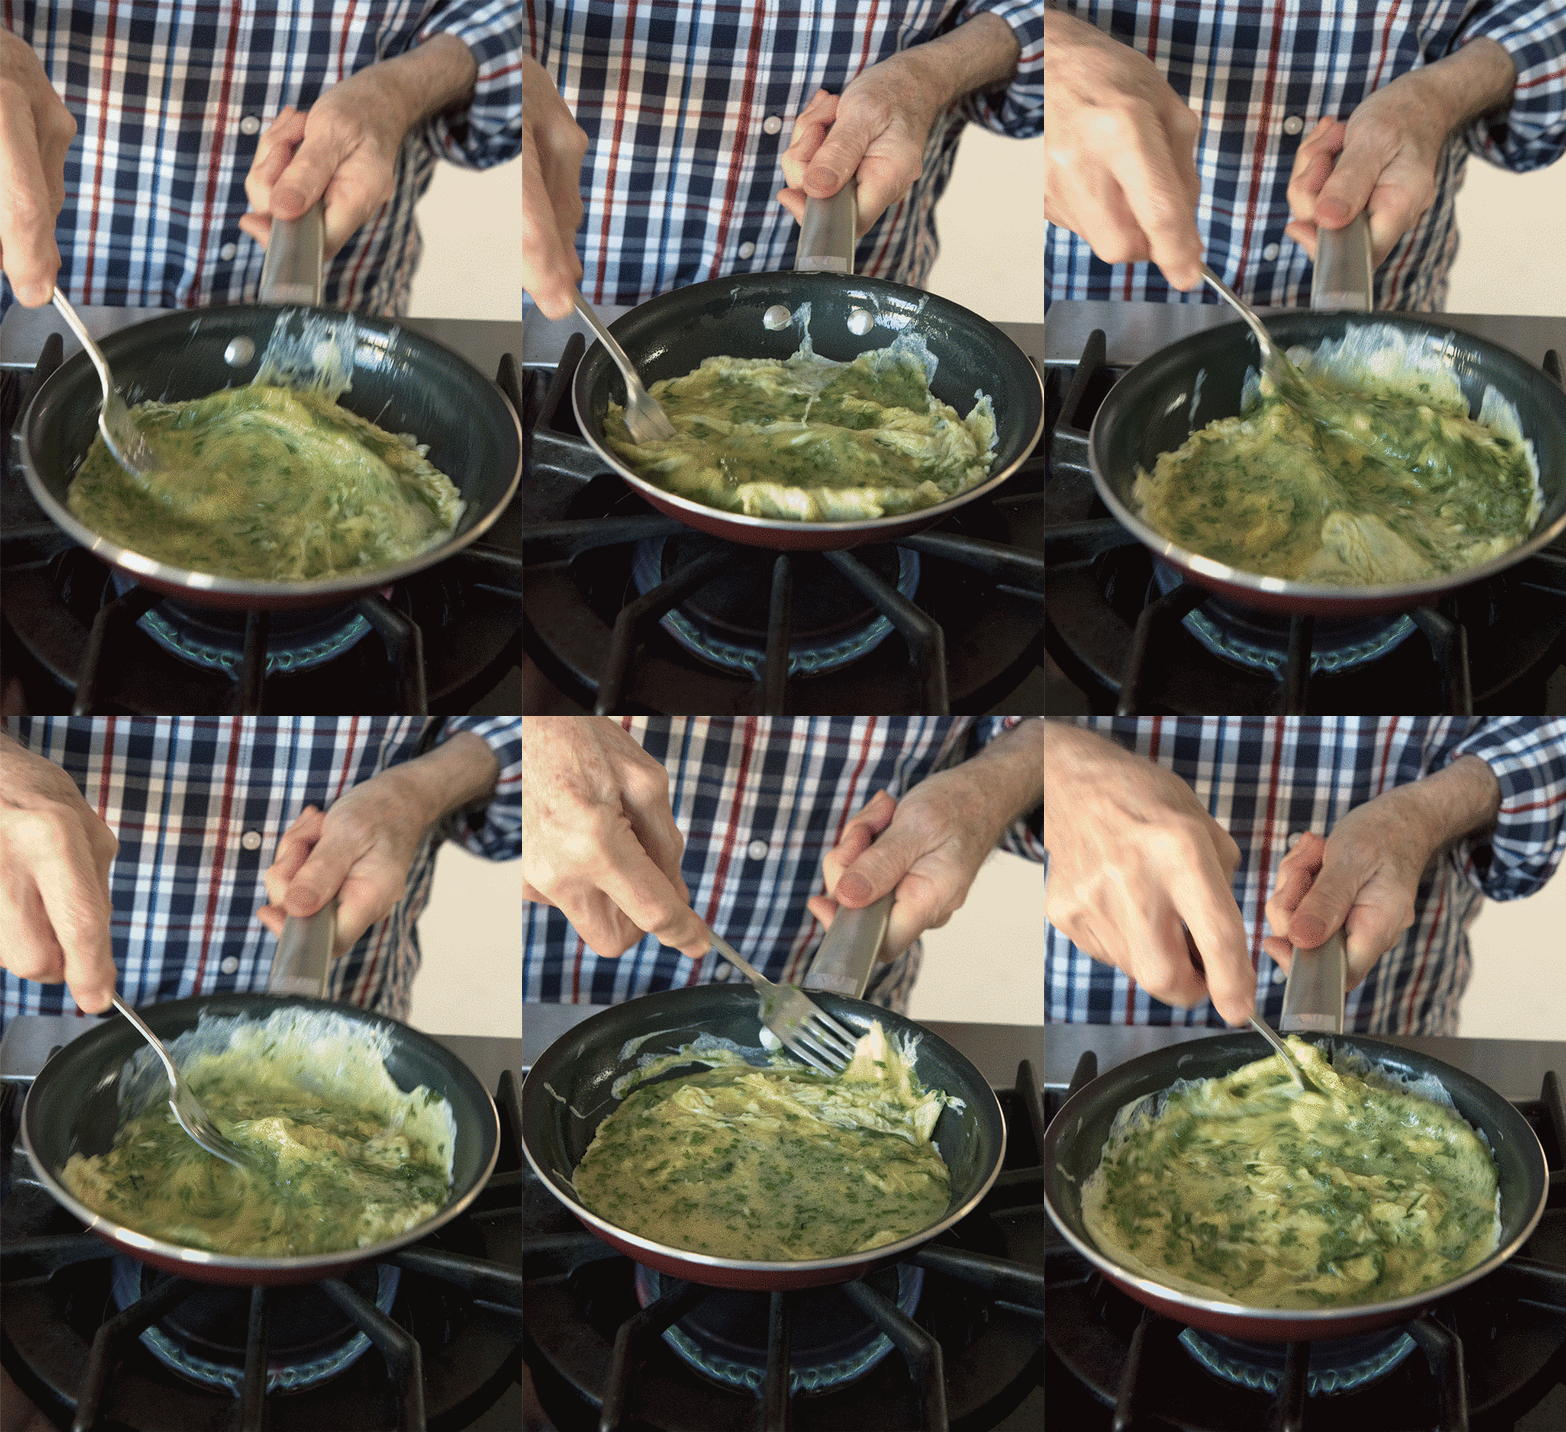
9. Now: Start whisking with the fork. The eggs will start to cook almost immediately, so you need to keep your fork moving AT ALL TIMES.
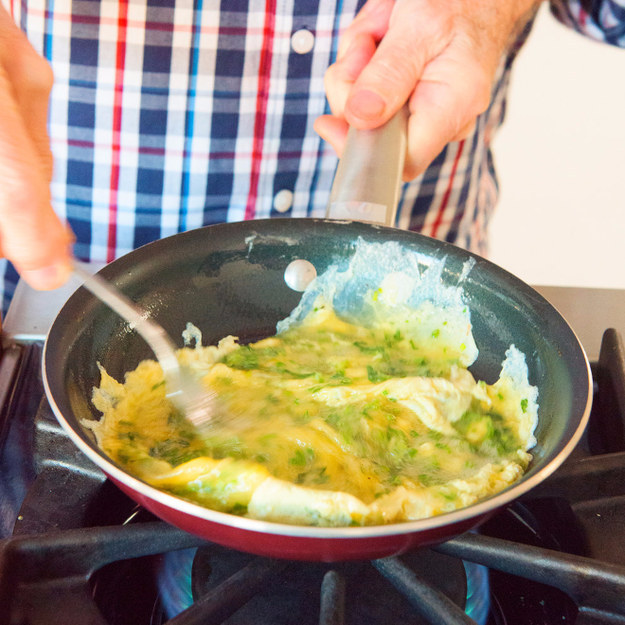
Now: Start whisking with the fork. The eggs will start to cook almost immediately, so you need to keep your fork moving AT ALL TIMES.
Lauren Zaser / Via BuzzFeed
This means scraping the bottom and sides of the skillet with the bottom of the fork. You’ll notice this start will to look like scrambled eggs, which is what you want.

10. You should also shake the skillet occasionally to help move the eggs around.
How Legendary French Chef Jacques Pépin Makes A Perfect Omelette
Lauren Zaser/Sarah Kobos / Via BuzzFeed
Remember, the eggs will start to cook around the edges first, so it’s important to clean the sides of the skillet and bring that cooked egg into the center.

11. After a few seconds the eggs should be mostly set, but still a little wet and custardy.
Lauren Zaser / Via BuzzFeed
A good way to test this is to drag the fork in from the side. The eggs should hold together.

12. REMOVE THE SKILLET FROM THE HEAT NOW!

You want the eggs to stay creamy and you don’t want them to brown on the bottom.

13. Next, starting at the end closest to the handle, use the fork to start to rolling the omelette onto itself.
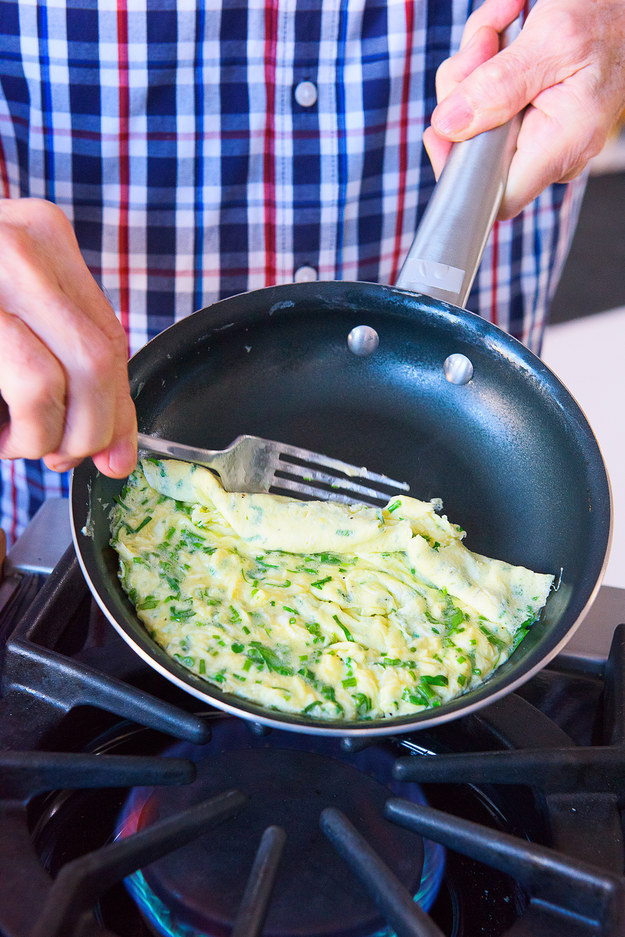
Next, starting at the end closest to the handle, use the fork to start to rolling the omelette onto itself.
Lauren Zaser / Via BuzzFeed
“Just like rolling a carpet,” Jacques says.
Because you’re using a nonstick skillet, the eggs should peel right up, but if they do stick, you can add some butter to help them release.

14. OK, so now Jacques does something really next-level. In order to make the omelette perfectly fat (instead of flat), he hits the skillet handle with his palm while tilting the skillet up, so the omelette flips up onto itself, compacting it.

Lauren Zaser/Sarah Kobos / Via BuzzFeed
He has done this about a million times in his life, so it’s pretty easy for him. For someone who *hasn’t* (me?), this is kinda tricky and may take some practice. The good news is that this is optional, and even if you don’t master this part, the omelette will still taste 100.

15. Now, if you can’t do the whole handle-flip thing, use your fork to fold the other side to meet the first side in the middle. This is a JUDGMENT-FREE ZONE.
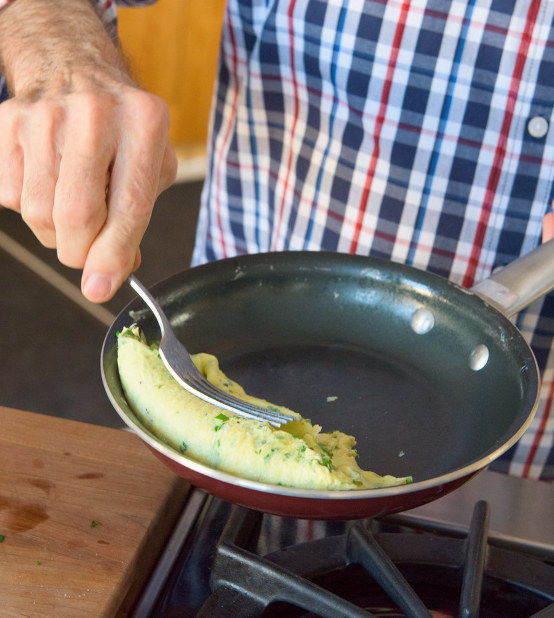
Now, if you can't do the whole handle-flip thing, use your fork to fold the other side to meet the first side in the middle. This is a JUDGMENT-FREE ZONE.
Lauren Zaser / Via BuzzFeed

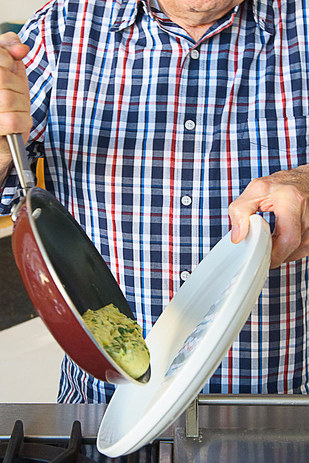
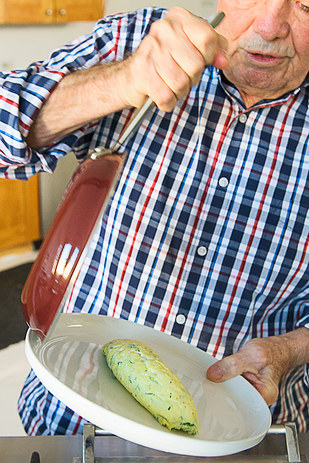
16. Tilt the plate to meet the skillet, so the omelette gently lands on the plate, SEAM-SIDE DOWN. (The seam is where the two edges meet.)
Lauren Zaser / Via BuzzFeed

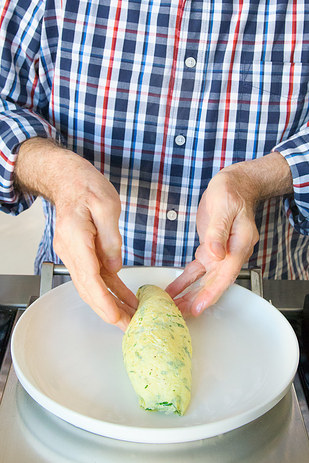
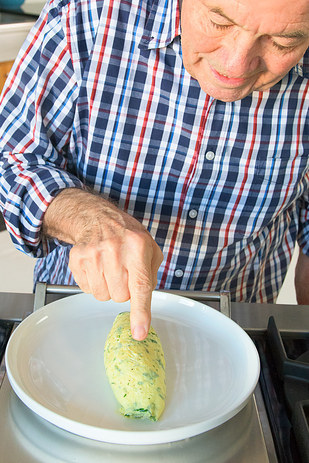
17. Then go ahead and give it a little tuck-in on the edges, so it keeps its cute, tapered, torpedo shape. And see? No browning.
Lauren Zaser / Via BuzzFeed
Goodnight, little fella.

18. It should still be *slightly* runny/creamy in the center, which means you might see some egg seep out, but don’t be afraid, that’s how it’s supposed to be.
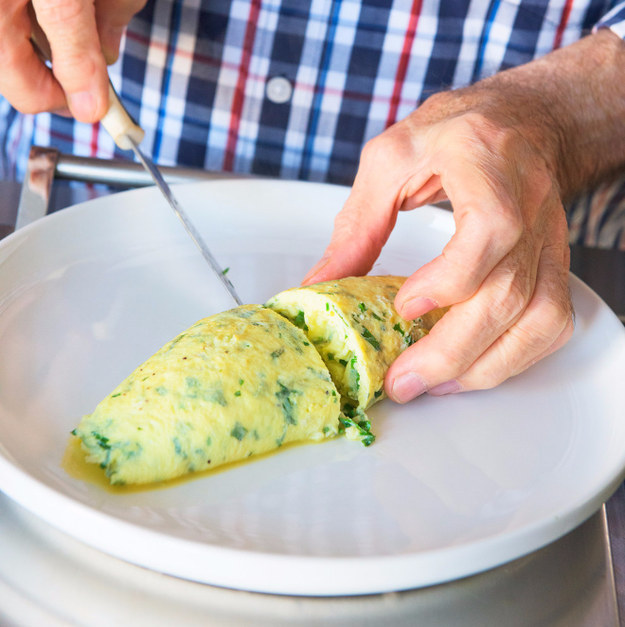
It should still be *slightly* runny/creamy in the center, which means you might see some egg seep out, but don't be afraid, that's how it's supposed to be.
Lauren Zaser / Via BuzzFeed
JACQUES SAYS SO.

THE PERECT OMELETTE.
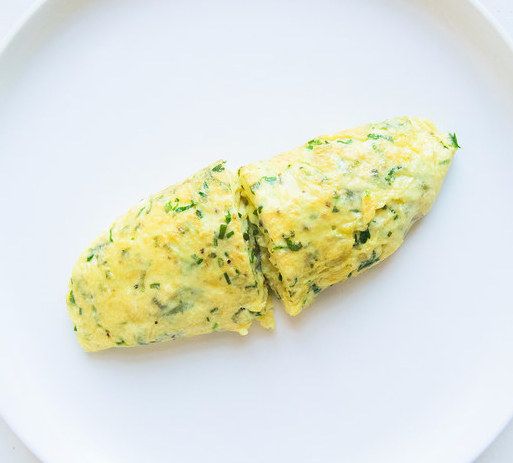
THE PERECT OMELETTE.
Lauren Zaser / Via BuzzFeed

Jacques Pépin’s Iconic French Omelette

Recipe by Jacques Pépin
Makes 1
2 Tbsp. finely chopped chives
1 Tbsp. finely chopped tarragon
1 Tbsp. finely chopped parsley
3 large eggs
Kosher salt and pepper
2 Tbsp. unsalted butter
Using a fork, whisk the herbs and eggs together in a bowl until they’re really (really) well-blended. This means there should be no strands of egg yolk or egg white, just homogenized egg. Season with salt and pepper.
Heat an 8-inch nonstick skillet over medium heat. Add the butter; it should barely sizzle but melt immediately. (If the butter sizzles loudly and foams up, the skillet is too hot. Remove it from the heat for a second to let it cool down.)
Add the eggs to the skillet, and using the flat side of the fork, immediately start whisking and stirring the eggs from the edges to the center, shaking the skillet occasionally. Do this for about 45 seconds. The eggs will start to look like a soft scramble. Once the eggs are mostly set but still look soft and slightly wet, remove the pan from the heat.
Using the fork, start at the side closest to the handle and start rolling the omelette onto itself, like you’re rolling a carpet.
Once you’re about halfway there, start rolling from the other side to meet in the middle. Because you’re using a nonstick skillet, this should be pretty easy. If the egg sticks a little, add a little more butter to help it along.
Flip the omelette onto a plate, seam-side down. If it doesn’t come out in a perfect shape, NBD, just kinda tuck the sides in to keep a nice torpedo shape.
Eat immediately!
Jacques Pepin

Cooking Tricks


Monday, June 13, 2016

Yes, Blackberry Cobbler Again


Blackberry Cobbler II


"Throw together this cobbler in minutes using fresh berries from the yard!"
Featured in Allrecipes Magazine
 

Ingredients

45 m 8 servings 318 cals

Directions

  • Prep
  • Cook
  • Ready In
  1. Preheat oven to 400 degrees F (200 degrees C). Line a baking sheet with aluminum foil.
  2. In a large bowl, mix the flour, 1/2 cup sugar, baking powder, and salt. Cut in butter until the mixture resembles coarse crumbs. Stir in 1/4 cup boiling water just until mixture is evenly moist.
  3. In a separate bowl, dissolve the cornstarch in cold water. Mix in remaining 1 cup sugar, lemon juice, and blackberries. Transfer to a cast iron skillet, and bring to a boil, stirring frequently. Drop dough into the skillet by spoonfuls. Place skillet on the foil lined baking sheet.
Bake 25 minutes in the preheated oven, until dough is golden brown.


 http://allrecipes.com/recipe/65155/blackberry-cobbler-ii/


Simply Sour Cream Chicken Enchiladas


Simply Sour Cream Chicken Enchiladas

1 lb chicken breast, diced
1 medium onion, chopped
1 tablespoon vegetable oil
8 (8 inch) flour tortillas, softened
1 1⁄2 cups grated Monterrey jack cheese or 1 1⁄2 cups Mexican blend cheese, divided
1⁄4 cup butter
1⁄4 cup flour
1 (15 ounce) can chicken broth
1 cup sour cream
1 (4 ounce) can chopped green chilies


DIRECTIONS
In fry-pan, cook chicken and onion together in oil over medium-high heat until chicken is just done.
Divide cooked chicken evenly between 8 tortillas; add 1 1/2 tablespoons cheese to each tortilla.
Roll enchiladas and place seam-side down in 9×13″ baking dish that has been lightly sprayed with no-stick cooking spray.


Melt butter in a medium saucepan; stir in flour to make a roux; stir and cook until bubbly; gradually whisk in chicken broth then bring to boiling, stirring frequently.


Remove from heat; stir in sour cream and green chilies; pour sauce evenly over enchiladas.


Top with remaining 3/4 cup cheese (baking dish may be double-wrapped and frozen at this point) and bake at 400F for 20 minutes until cheese is melted and sauce near edges of baking dish is bubbly.


Friday, June 10, 2016

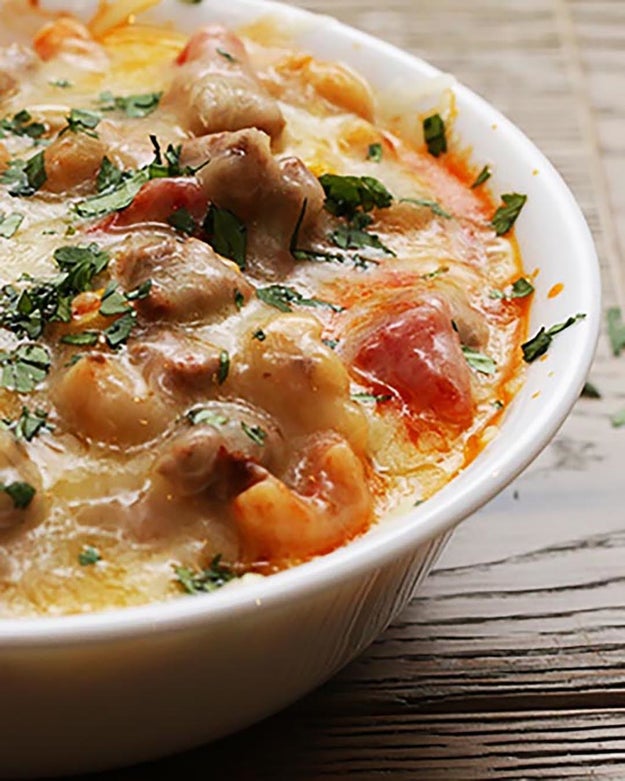
Cheesy Taco Pasta


One- Pot Cheesy Taco Pasta


 Video On YouTube


INGREDIENTS

Servings: 10-12
1 lb ground beef
1 package taco seasoning
2 cups water
1 (15 oz) can diced tomatoes
1 (15 oz) can tomato sauce
1 (15 oz) can whole kernel corn
2 cups uncooked elbow macaroni
Pepper
Salt
OPTIONAL INGREDIENTS:  Black Beans, Nacho Chips


PREPARATION

1. Brown beef in a large quart pot over medium/ high heat. Drain fat and return beef to pot.
2. Add taco seasoning, water, tomatoes, tomato sauce and corn. Bring to a boil.
3. Add uncooked macaroni and reduce heat to low. Cover and simmer for 10-15 minutes (until pasta is cooked through). Stir occasionally.
4. Remove from heat. Sprinkle cheese on top and cover.
5. Serve when cheese is melted!  (OR, keep warm by turning heat to LOW being careful to not burn ... OR, turn off until ready to serve then WARM up by microwaving each bowl [if necessary]

TIP:  Have a bowl of "Nacho" chips handy.  Guests can add the chips to their bowl of Taco Pasta if wanted.


Tasty's URL:  https://www.buzzfeed.com/merleoneal/this-one-pot-taco-pasta-is-a-cheese-lovers-dream?bffbtasty&utm_term=.fi2m1oz90#.hbW8yvOQL


Wednesday, May 25, 2016

Grilled Hawaiian Chicken Kabobs


Hawaiian Chicken Kabobs

Grilled Hawaiian Chicken Kabobs. Tender juicy chicken layered with a rainbow of veggies in a tangy Pineapple Honey BBQ Sauce.  The perfect quick & easy summer meal!

Grilled Hawaiian Chicken Kabobs. Tender juicy chicken layered with a rainbow of veggies in a tangy Pineapple Honey BBQ Sauce. The perfect quick & easy summer meal!
© COOK CRAVE INSPIRE by SpendWithPennies.com

Hawaiian Chicken Kabobs

Follow Spend With Pennies on Pinterest for more great recipes!

Kabobs are the perfect summer meal! Chicken and fresh veggies all beautifully stacked on a skewer and grilled until caramelized. So pretty, full of color & flavor and quick to make.

The possibilities are endless.  These Hawaiian Chicken Kabobs are delicious when you make them and perfect leftover and added to a salad for lunch the next day.

A rainbow of veggies stacked with tender juicy chicken makes these Grilled Hawaiian Chicken Kabobs the perfect summer meal.

One of the very best things about summer is all of the fresh produce and I try to incorporate it into every meal.

These Hawaiian Chicken Kabobs are loaded up with peppers, chicken and of course pineapple and are brushed with an easy to create Pineapple Honey BBQ sauce!

Grilled Hawaiian Chicken Kabobs. A rainbow of veggies and tender juicy chicken layered with a tangy Pineapple Honey BBQ Sauce. The perfect quick & easy summer meal!

Having a delicious thick BBQ sauce is great to add that sticky caramelized finish we all love so much .
The new KC Masterpiece® BBQ Sauce & Dry Rubs can be combined with ANY liquid to create a delicious sauce or marinade.  I simply added pineapple juice to the mix and stirred it to create the perfect thick sauce!  The result was tender grilled kabobs with loads of sweet tangy pineapple flavor.

Grilled Hawaiian Chicken Kabobs. A rainbow of veggies and tender juicy chicken layered with a tangy Pineapple Honey BBQ Sauce. The perfect quick & easy summer meal!

If you haven’t seen these mixes yet, I’m kind of in love with them! Each box comes with two pouches of mix that can be combined with any liquid to create your own sauces and marinades…  think beer, cola, juice or root beer to create the perfect BBQ sauce for your summer grilling!

You can also use the mixes as a dry rub for the perfect grilled chicken!  (Next on my list is Spicy Habanero mixed with beer for an amazing rib sauce).

You can find all of the ingredients you need for these Kabobs at Walmart including three great flavors of KC Masterpiece® BBQ Sauce & Dry Rub in Original, Sweet Honey, and Spicy Habanero.

Grilled Hawaiian Chicken Kabobs. A rainbow of veggies and tender juicy chicken layered with a tangy Pineapple Honey BBQ Sauce. The perfect quick & easy summer meal!


Grilled Hawaiian Chicken Kabobs


Author:
Serves: 8 skewers

Ingredients
  • 1 box KC Masterpiece® BBQ Sauce & Dry Rub, Sweet Honey
  • 1¾ cup pineapple juice, divided
  • 4 large boneless skinless chicken breasts
  • 1 cup mushrooms, halved
  • 1 red bell pepper
  • 1 orange bell pepper
  • 1 cup diced pineapple
  • 1 green bell pepper
  • 1 purple onion

Instructions


Pineapple Honey BBQ Sauce

  1. Combine ¾ pineapple juice and 1 pouch KC Masterpiece® BBQ Sauce & Dry Rub. Set aside.

Hawaiian Skewers
Soak Wooden Skewers In Water

  1. Cut chicken into bite sized pieces. In a large zipper bag combine 1 cup pineapple juice and 1 pouch KC Masterpiece® BBQ Sauce & Dry Rub and chicken. Marinate 30 minutes.
  2. Preheat grill to medium high.
  3. Thread chicken and vegetables onto skewers and brush with BBQ Sauce.
  4. Grill 12-16 minutes or until cooked through.

https://www.blogger.com/blogger.g?blogID=1531472059012387711#editor/target=post;postID=1899245962791477804


Tuesday, May 24, 2016

'Bloomin Onion' by "Tasty" on YouTube


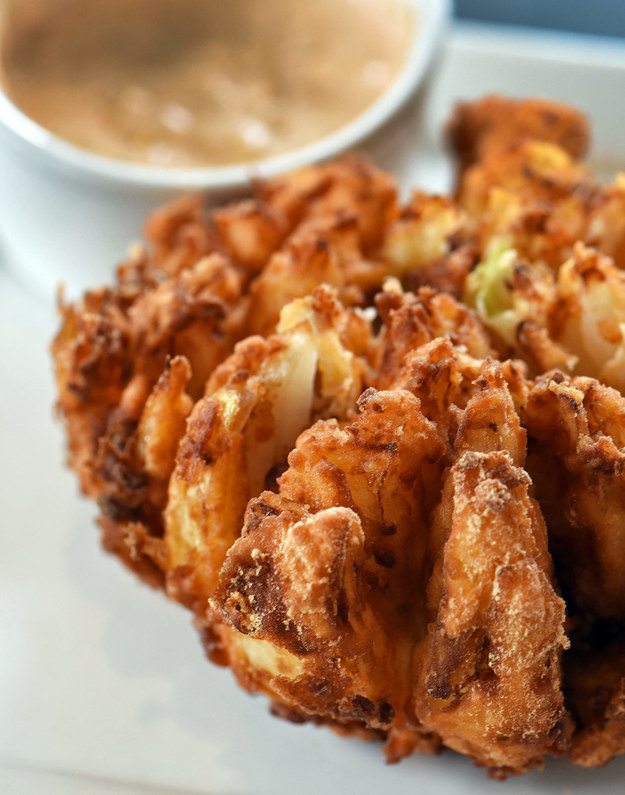
Deep-Fried Lotus Onion

Deep-Fried Blooming Onion


INGREDIENTS

1 large sweet onion
1½ cups milk
2 eggs
1½ cups flour
1½ Tbsp. garlic powder
1 Tbsp. paprika
2 Tsp. pepper
1 Tbsp. salt
3-4 cups canola oil
Dipping Sauce:
2 Tbsp. sour cream
2 Tbsp. mayonnaise
1½ Tbsp. ketchup
1½ Worcestershire sauce
1½ tsp. salt
1 tsp pepper
1 tbsp. paprika

PREPARATION

Cut the top of an onion and place it cut-side down.

Using a sharp knife make 4 ½-inch cuts then go back and make 3 cuts in between each quarter.

Flip the onion over and coax apart its layers or “petals”. In a medium bowl, combine the eggs and the milk.

Place the onion in it, coating every petal with egg wash. 

In large bowl combine flour, paprika, oregano, salt, garlic powder, and black pepper. 

Place the onion in the dry mixture coating every petal.

Coat the onion in the egg wash and dry mixture one more time.

Heat canola oil to 375ºF/190ºC in a deep-fryer or dutch oven.

Place onion in the freezer for 10 minutes.

With tongs add the onion to the oil for 2 minutes or until it is browned and crispy.

Move onion to plate covered in paper towels and allow to drain for 5 minutes.

Meanwhile, in a small bowl combine sour cream, salt, pepper, paprika, mayonnaise, Worcestershire sauce, and ketchup.
 

Deep-Fried Lotus Onion


https://www.youtube.com/watch?v=NS6c1f71JhA


Sunday, May 22, 2016

*** Blackberry Dumplings - - - Blueberry Cobbler EASY


* ~ * ~ * ~ * ~ * ~ * ~ * ~ * ~ * ~ * ~ * ~ * ~ * ~ * ~ * ~ * ~ *
Blueberry Cobbler

Here is what you will need!

INGREDIENTS:
1 can biscuits
6 cups blueberries
1/2 brown sugar
1 tbsp cinnamon
2 tbsp cornstarch


INSTRUCTIONS:
In a large bowl add your blueberries, brown sugar, cinnamon and cornstarch and mix it together thoroughly. Quarter your canned biscuits and set aside. In a slow cooker pour your blueberry mix and top evenly with your quartered biscuits. Cook on high for 2.5 - 3 hours and server a la mode with vanilla ice cream or your favorite whipped cream!


https://www.youtube.com/watch?v=GA7AbO9RGLc

Wondering if I could use blackberries instead of blueberries... I think it would work.


another video,,, https://www.youtube.com/watch?v=GA7AbO9RGLc


Saturday, April 16, 2016

Tasty Baked Garlic Parmesan Potato Wedges


3 large russet potatoes, sliced into wedges
4 Tbsp. olive oil

1/2 cup Parmesan
Salt to taste
2 tsp Italian seasoning
2 tsp garlic powder
2 tsp paprika

Instructions:
1. Place potato wedges in a large bowl. Drizzle olive oil and toss to coat. Sprinkle potato wedges with shredded cheese and toss again.

2. In a small bowl, mix salt, Italian seasoning, garlic powder, and paprika. Sprinkle seasoning onto potato wedges and toss to coat.

3. Place potato wedges on a baking sheet with skin-sides-down. Bake for 40 minutes at 400˚F / 200˚C until potatoes are fork-tender and golden.


https://www.youtube.com/watch?v=8XyyWIGgqRE


Tuesday, April 12, 2016

Pineapple Cake - 2 Ingredient and Easy


2 Ingredient Fluff Cake
 

Prep time 
Cook time 
Total time 
 
Fluff Cake is a delicious fat free, low calorie dessert with only TWO ingredients! It's the easiest dessert to make and comes out fluffy and light. Great served with fruit and whipped topping.

Serves: about 12 servings (from a 9x13 pan)
Ingredients
  • 1 (16-oz) box angel food cake mix
  • 1 (20-oz) can crushed pineapple, not drained
  • whipped topping, for serving
  • chopped fruit, for serving
Instructions
  1. Preheat oven to 350ºF. Spray a 9x13" pan with cooking spray and set aside.
  2. In a mixing bowl, combine the dry angel food cake mix with the crushed pineapple, juice and all. Stir well.
  3. Pour cake batter into prepared pan and bake in preheated oven for 35-40 mins. Keep checking the cake after about 30 minutes. The cake will be springy to the touch when cooked through and golden brown on the top.
  4. Let cool and then cut into squares. Serve with whipped topping and fruit. Enjoy!
Notes
nutrition information from caloriecount.com
Nutrition Information
Serving size: per square (12 total) not including whipped topping & fruit Calories: 120 Fat: 0 g Trans fat: 0 g Carbohydrates: 28 g Sugar: 16 g Sodium: 193 mg Fiber: 0.7 g Protein: 2.6 g Cholesterol: 0 g

Fluff Cake is a delicious fat-free, low-calorie dessert with only TWO easy ingredients! It's the easiest dessert to make and comes out fluffy and light. Great served with fruit and whipped topping. :) 


https://www.youtube.com/watch?v=m8cUXbqVsck


Thursday, March 31, 2016

Red Lobster Crab-Stuffed Mushrooms


https://www.youtube.com/watch?v=ZwyvFdITE4A


OTHER STUFFED MUSHROOMS RECIPES
 * * * * *

Ingredients 

Directions

  1. Preheat oven to 400deg F.
  2. Wash mushrooms and remove stems.
  3. Set caps aside, and chop half of the stems.
  4. Saute chopped mushroom stems,celery, onion and pepper in butter for 2 minutes.
  5. Transfer to a plate and cool in refrigerator.
  6. Combine sauteed vegetables and all other ingredients (except cheese slices) and mix well.
  7. Place mushroom caps in a sprayed or buttered baking pan stem side up.
  8. Spoon 1 tsp stuffing into each mushroom cap.
  9. Cover with a piece of sliced cheese.
  10. Bake for 12-15 minutes until cheese is lightly brown.


* * * * *


Ingredients

20 m 8 servings 310 cals

Directions

  • Preheat the oven to 375 degrees F (190 degrees C). Brush a large baking sheet with about 1/4 cup of melted butter. Arrange mushroom caps in a single layer over the baking sheet.
  • In a medium bowl, mix together the crushed croutons, remaining 1/2 cup butter, shredded cheese, crabmeat, lobster and garlic. Spoon into mushroom caps where the stems used to be.
  • Bake for 10 to 12 minutes in the preheated oven, or until lightly browned on the top. Sprinkle with additional cheese if desired, and serve hot!

  • Tip
  • Aluminum foil can be used to keep food moist, cook it evenly, and make clean-up easier.

    * * * * * * 


Red lobster crab and lobster stuffed mushrooms

Red Lobster
Red Lobster
Ingredients
3/4 cup melted butter, divided
1 pound fresh mushrooms, stems removed
1 cup crushed seasoned croutons
1 cup shredded mozzarella cheese
1 (6 ounce) can crabmeat, drained
1 pound lobster tail, cleaned and chopped
3 tablespoons minced garlic
Red lobster crab and lobster stuffed mushrooms
1/4 cup shredded mozzarella cheese (optional)

Directions
Preheat the oven to 375 degrees F (190 degrees C). Brush a large baking sheet with about 1/4 cup of melted butter. Arrange mushroom caps in a single layer over the baking sheet.
In a medium bowl, mix together the crushed croutons, remaining 1/2 cup butter, shredded cheese, crabmeat, lobster and garlic. Spoon into mushroom caps where the stems used to be.
Bake for 10 to 12 minutes in the preheated oven, or until lightly browned on the top. Sprinkle with additional cheese if desired, and serve hot!

http://lancastria.net/blog/red-lobster-crab-and-lobster-stuffed-mushrooms.html


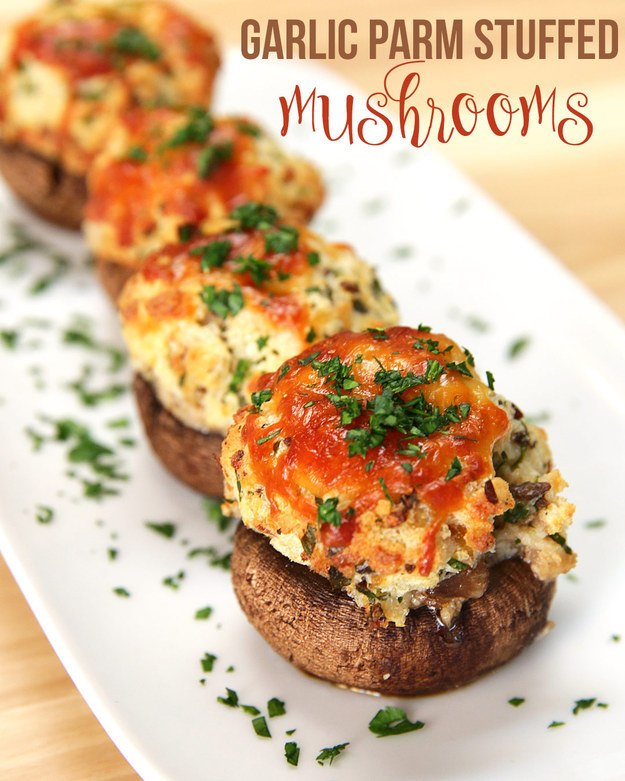
Garlic Parmesan-Stuffed Mushrooms


Garlic Parm Stuffed Mushrooms


INGREDIENTS

Makes 15
15 mushrooms
1 tablespoon canola oil
2 tablespoons chopped garlic
½ tablespoon kosher salt
½ tablespoons freshly ground black pepper
8 ounces softened cream cheese
¼ cup Italian breadcrumbs
½ cup shredded Parmesan cheese, divided
2 tablespoons chopped parsley
Kosher salt
Freshly ground black pepper
Chopped parsley, to garnish

PREPARATION

1. Preheat oven to 350° F.
2. Cut the stems off of each of the mushrooms and finely chop them, setting the mushroom caps aside for later.
3. Heat the oil in a pan over high heat. Cook the chopped stems with the garlic, salt, and pepper for about six to eight minutes, constantly stirring. Be careful not to burn the garlic. Remove from heat.
4. In a medium bowl, combine cooked stems, cream cheese, breadcrumbs, half of the Parmesan, parsley, salt, and pepper, mixing until evenly combined. The mixture should be extremely thick.
5. Space out the mushroom caps evenly on a baking sheet, upside down. Spoon a generous amount of the cream cheese mixture on top of each mushroom. Top each mushroom with a sprinkle of Parmesan cheese. Bake for 20 minutes.
6. Garnish with a sprinkle of parsley, then serve!


https://www.youtube.com/watch?v=WMSO7qYjTm0